
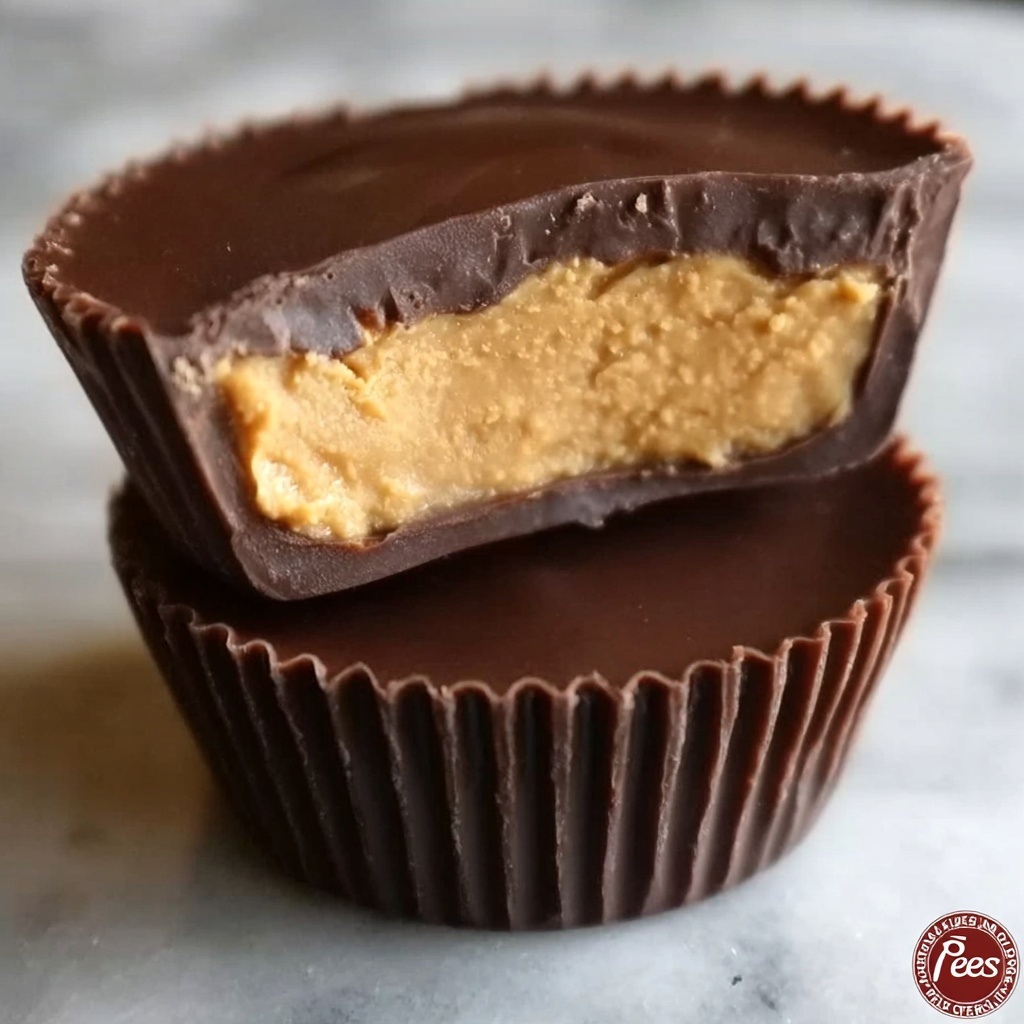
If you have a soft spot for the perfect blend of chocolate and peanut butter, then get ready to fall in love with this delightfully simple treat. The 3-Ingredient Homemade Reese’s Cups: Better Than Store-Bought Recipe takes just minutes to prepare but delivers a rich, creamy, and utterly satisfying flavor that rivals any candy aisle favorite. These homemade cups have that irresistible combination of smooth chocolate and luscious peanut butter that will instantly become your go-to indulgence when cravings strike.
Ingredients You’ll Need
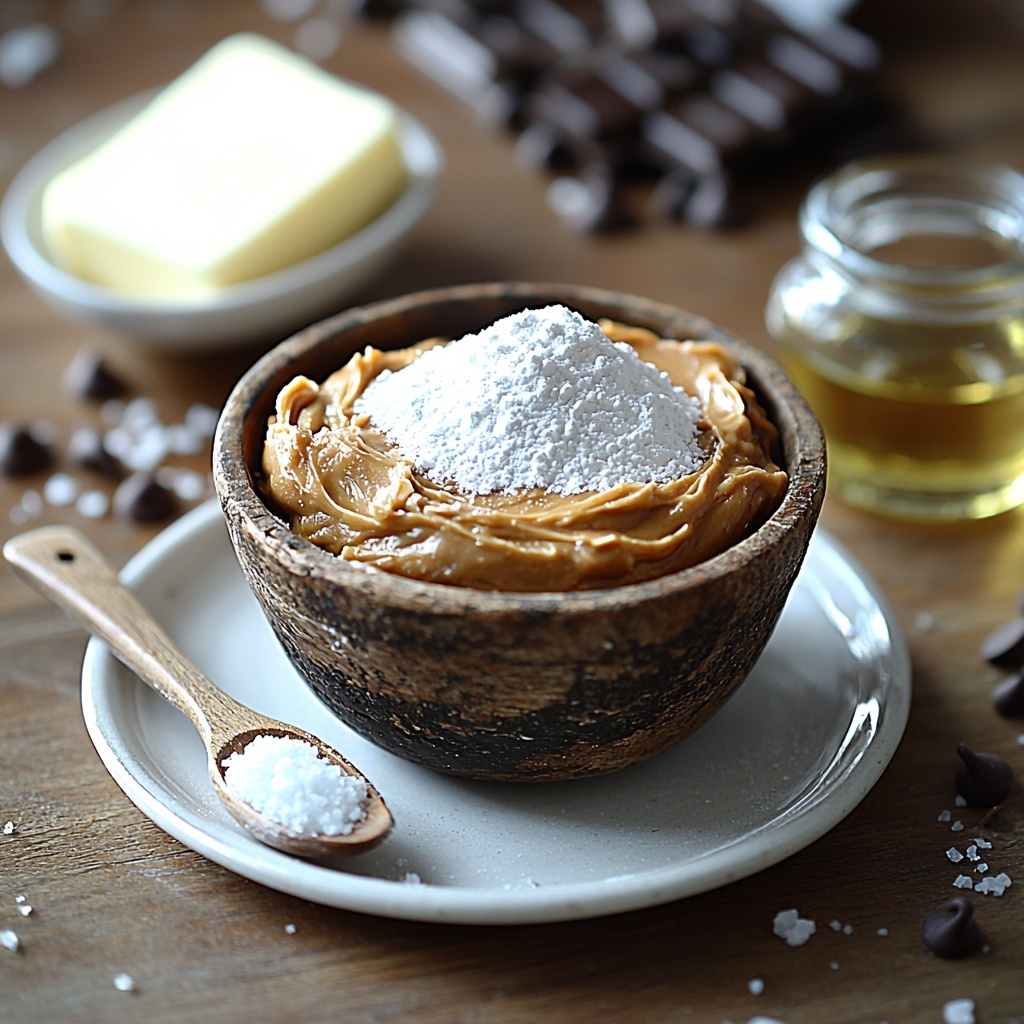
What makes this recipe truly special is how just a few simple ingredients come together to create an extraordinary taste experience. Each one is carefully chosen to balance sweetness, creaminess, and that familiar classic texture, ensuring your homemade cups are just right.
- 1 cup creamy peanut butter: Provides the classic, silky peanut butter center that’s essential to that rich, nutty flavor.
- 1/2 cup powdered sugar: Adds sweetness and helps give the peanut butter filling structure without graininess.
- 2 tbsp unsalted butter: Brings a subtle richness and smoothness to the peanut butter mixture.
- 1/4 tsp salt: Enhances the flavor by balancing sweetness, bringing out a deeper peanut taste.
- 1 1/2 cups milk chocolate chips: Creates the irresistibly smooth and creamy chocolate shell on the outside.
- 1 tsp coconut oil: Helps the chocolate melt nicely and sets beautifully for a perfect snap.
How to Make 3-Ingredient Homemade Reese’s Cups: Better Than Store-Bought Recipe
Step 1: Prepare Your Equipment
Start by lining a mini muffin tin with paper liners; this will keep your peanut butter cups neatly contained and make them easy to remove once set. Having everything ready ensures a smooth assembly process.
Step 2: Make the Peanut Butter Filling
In a mixing bowl, combine the creamy peanut butter, powdered sugar, softened butter, and salt. Stir everything together until the mixture turns silky and uniform. This smooth filling is the heart of your homemade treat, packed with flavor and just the right amount of sweetness.
Step 3: Shape the Filling
Roll the peanut butter mixture into small balls, about the size of a teaspoon, then gently flatten them just enough to fit comfortably inside the liners. This sets the perfect base for your chocolate coating without overflowing.
Step 4: Melt the Chocolate
Place the milk chocolate chips and coconut oil in a microwave-safe bowl and melt them in short bursts, stirring frequently until glossy and smooth. The coconut oil not only helps the chocolate flow beautifully but also gives it a nice sheen once hardened.
Step 5: Assemble Your Cups
Spoon a layer of melted chocolate into each paper liner to cover the bottom completely. Next, carefully press one of the peanut butter discs on top of the chocolate. Finally, pour another layer of melted chocolate over the peanut butter, ensuring each cup is fully covered for that classic look.
Step 6: Chill Until Set
Place your tray in the refrigerator and let the cups chill for about 30 minutes. This waiting time is crucial as it allows the chocolate to harden perfectly, giving you that satisfying snap and making the cups easy to handle.
How to Serve 3-Ingredient Homemade Reese’s Cups: Better Than Store-Bought Recipe
Garnishes
While these homemade cups are delicious on their own, you can get creative by sprinkling a pinch of sea salt on top before the chocolate sets for a gourmet touch, or even add a tiny drizzle of caramel for extra indulgence. These small additions elevate the presentation and flavor in fun ways.
Side Dishes
Pair these peanut butter cups with a glass of cold milk or a hot cup of coffee to balance their sweetness. They also make a delightful companion to fresh fruit like strawberries or banana slices for a fun twist on dessert or snack time.
Creative Ways to Present
Package your finished peanut butter cups in a decorative box or mason jar with a ribbon for a thoughtful homemade gift. Alternatively, arrange them on a pretty plate with edible flowers or nuts to wow guests at your next gathering.
Make Ahead and Storage
Storing Leftovers
Once your 3-Ingredient Homemade Reese’s Cups: Better Than Store-Bought Recipe is complete, store leftovers in an airtight container in the refrigerator. They’ll stay fresh and flavorful for up to one week, making it easy to have a sweet treat on hand anytime.
Freezing
If you want to keep these cups for longer, place them in a freezer-safe container separated by parchment paper to prevent sticking. Frozen, they last up to three months and thaw quickly at room temperature when you’re ready to indulge.
Reheating
These peanut butter cups are best enjoyed cold or at room temperature, but if they feel too firm after refrigeration or freezing, simply let them sit out for 5-10 minutes before serving. Avoid microwaving as this can melt the chocolate unevenly.
FAQs
Can I use crunchy peanut butter instead of creamy?
Absolutely! Crunchy peanut butter will add a delightful texture to your filling, making the cups have a little extra bite and nuttiness.
Is it possible to substitute the milk chocolate with dark chocolate?
Yes, dark chocolate works wonderfully and provides a richer, slightly less sweet flavor that balances nicely with the peanut butter.
Do I need to use coconut oil when melting the chocolate?
Coconut oil helps the chocolate melt smoothly and sets with a nice shine, but if you don’t have it, you can melt chocolate alone—just be sure to stir often and melt gently.
Can I make this recipe vegan or dairy-free?
To keep it vegan or dairy-free, use dairy-free chocolate chips, a plant-based butter substitute, and make sure your peanut butter is free of any animal-derived ingredients.
How long does it take for the cups to set in the fridge?
It usually takes about 30 minutes for the chocolate to harden completely, but the time can vary slightly depending on your fridge’s temperature.
Final Thoughts
There’s something truly special about making your own treats from scratch, and this 3-Ingredient Homemade Reese’s Cups: Better Than Store-Bought Recipe proves delicious simplicity can beat any store-bought candy. Give this recipe a try—you’ll be amazed at how satisfying and addictive homemade can be. Once you taste these cups, you may never want to buy the boxed version again!
Print
3-Ingredient Homemade Reese’s Cups: Better Than Store-Bought Recipe
- Prep Time: 10 minutes
- Cook Time: 0 minutes
- Total Time: 40 minutes
- Yield: 12 servings (12 mini cups)
- Category: Dessert
- Method: No-Cook
- Cuisine: American
Description
These homemade Reese’s Cups are a simple, delicious treat made with just a few ingredients. Creamy peanut butter is blended with powdered sugar and butter to create a smooth filling, then coated in rich, melted milk chocolate. This easy no-bake recipe yields bite-sized, indulgent candies that are better than store-bought versions and perfect for satisfying your sweet tooth.
Ingredients
Peanut Butter Filling
- 1 cup creamy peanut butter
- 1/2 cup powdered sugar
- 2 tbsp unsalted butter, softened
- 1/4 tsp salt
Chocolate Coating
- 1 1/2 cups milk chocolate chips
- 1 tsp coconut oil
Instructions
- Prepare Muffin Tin: Line a mini muffin tin with paper liners to prevent sticking and for easy removal of the finished cups.
- Make Peanut Butter Mixture: In a mixing bowl, combine the creamy peanut butter, powdered sugar, softened butter, and salt. Mix thoroughly until you get a smooth, well-blended filling.
- Shape Peanut Butter Discs: Roll the peanut butter mixture into small balls, then flatten each one slightly so that they fit nicely into the muffin liners.
- Melt Chocolate: In a microwave-safe bowl, melt the milk chocolate chips together with the coconut oil. Heat in short bursts, stirring in between, until the mixture is fully smooth and melted.
- Layer Chocolate and Filling: Spoon a small amount of melted chocolate into each lined muffin cup, enough to cover the bottom. Place a peanut butter disc on top of the chocolate layer.
- Cover with Chocolate: Pour additional melted chocolate over each peanut butter disc, making sure the filling is completely covered with chocolate.
- Chill to Set: Place the filled muffin tin in the fridge and chill for about 30 minutes until the chocolate is fully set and firm.
Notes
- Use creamy peanut butter for the smoothest texture.
- If you don’t have coconut oil, you can use vegetable oil or butter to help melt the chocolate smoothly.
- Store the finished cups in the fridge to keep them firm, especially in warm climates.
- For a different flavor, try using dark chocolate or white chocolate instead of milk chocolate.
- These cups can be stored in an airtight container in the fridge for up to 2 weeks.


