
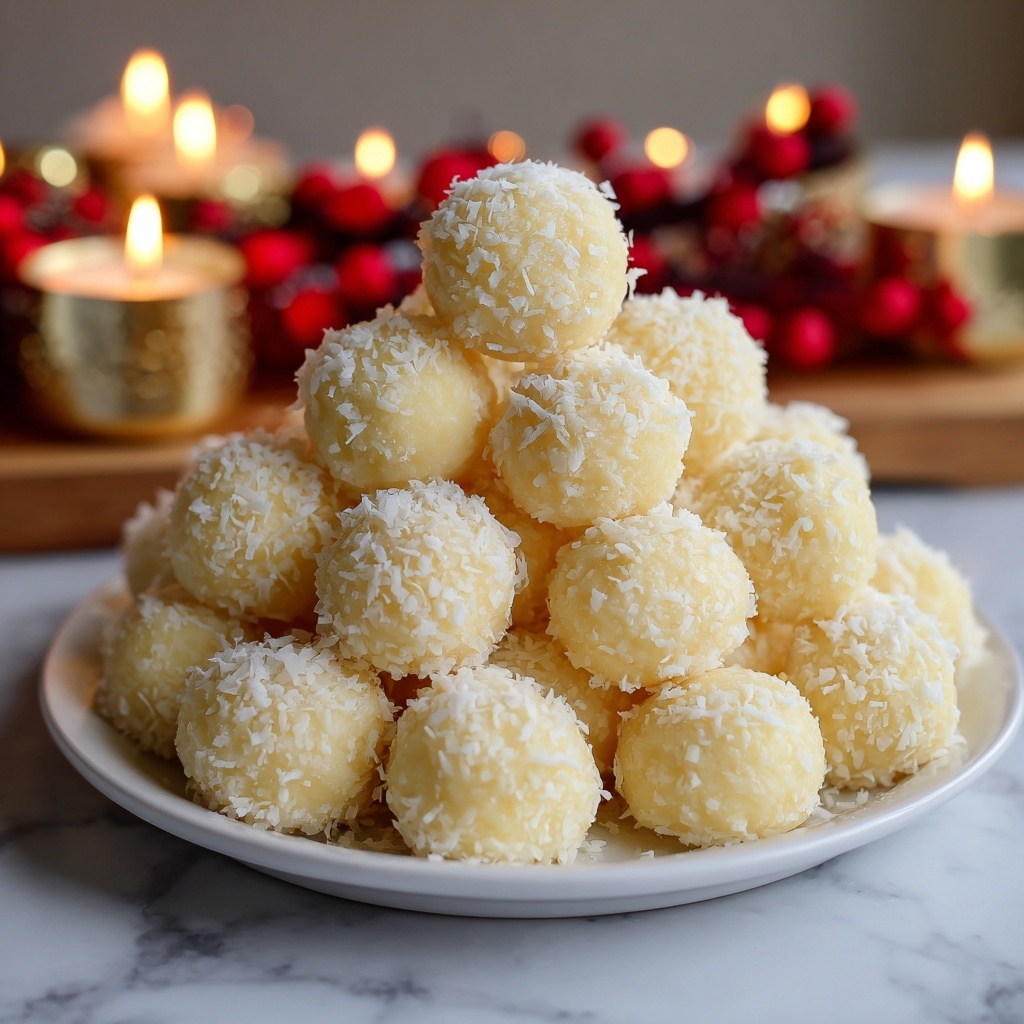
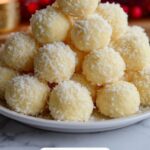
If you have a soft spot for melt-in-your-mouth candies that are simple to make and absolutely delightful to share, you are in for a treat with this Easy Butter Mints Recipe. These little pillow-shaped sweets offer a perfect balance of creamy butter, refreshing peppermint, and a delicate sugary texture that practically melts on your tongue. Whether you’re looking for a homemade gift, a festive touch for your holiday table, or a charming treat to enjoy with friends, these butter mints are guaranteed to delight with every bite.
Ingredients You’ll Need
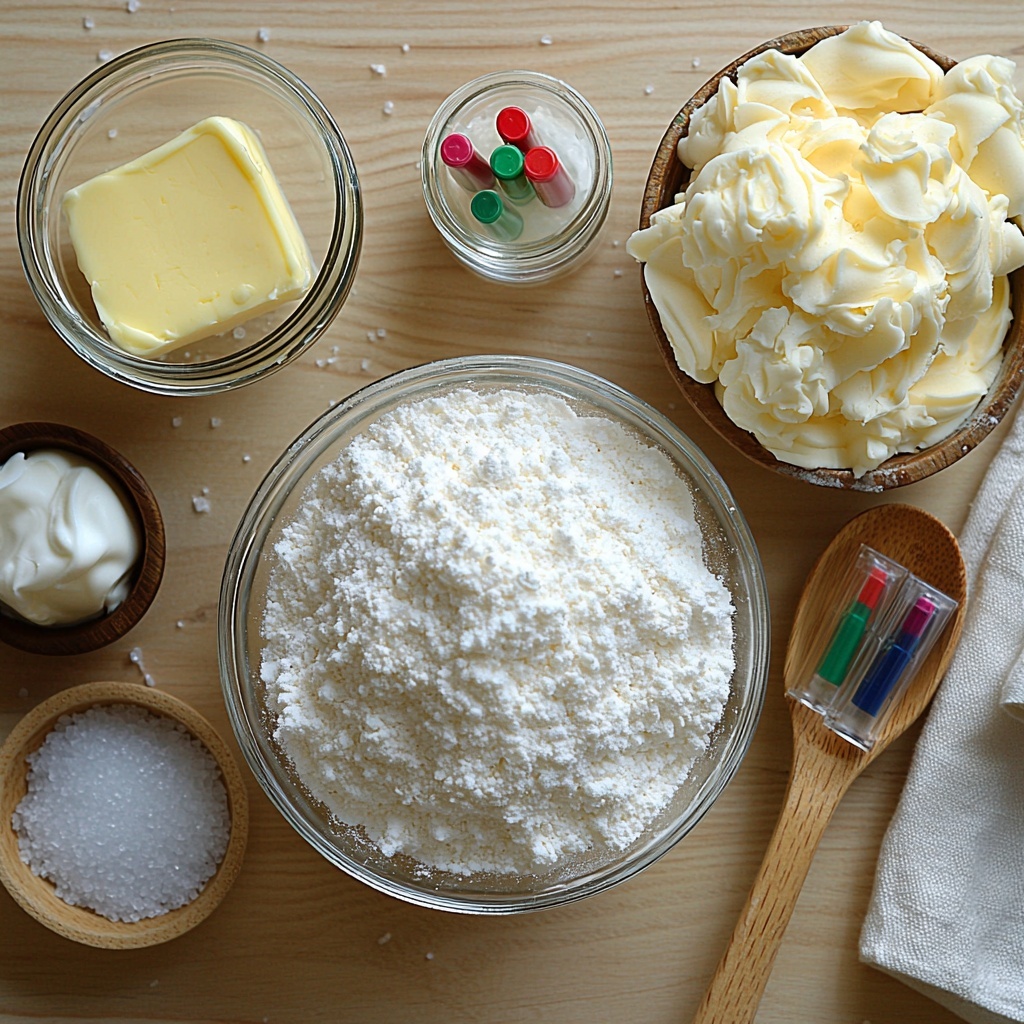
This Easy Butter Mints Recipe calls for just a handful of pantry staples that work together beautifully to create a luscious, smooth texture and that classic, cool mint flavor. Each ingredient plays a crucial role, from the creamy butter that forms the base to the powdered sugar that gives these mints their delicate sweetness and melt-in-your-mouth consistency.
- 1/2 cup unsalted butter, softened: Provides the rich, creamy foundation and smooth texture.
- 4 cups powdered sugar: Sweetens and thickens the candy, ensuring a perfect melt.
- 2 tablespoons heavy cream: Adds moisture for silkiness, making the dough easy to shape.
- 1/2 teaspoon peppermint extract: Offers that refreshing, classic mint flavor that’s essential for these mints.
- 1/8 teaspoon fine sea salt: Balances sweetness and enhances all the flavors.
- Gel food coloring, optional: Gives your mints a fun pop of color without changing the texture.
How to Make Easy Butter Mints Recipe
Step 1: Cream the Butter and Salt
Start by beating your softened unsalted butter together with the fine sea salt in a mixing bowl. You want to whip until the texture becomes smooth, creamy, and slightly lighter in color. This is the base of your mint dough, so getting it silky is the key to that perfect softness later.
Step 2: Add Peppermint and Cream
Next, pour in the peppermint extract and heavy cream. Beat them thoroughly into the butter mixture until fully combined and you see a glossy, silky texture forming. This step infuses the candy with its signature mint flavor and ensures everything blends seamlessly.
Step 3: Gradually Incorporate Powdered Sugar
Now comes the important part: folding in the powdered sugar. Add it slowly, about one cup at a time, starting your mixer on low to keep the sugar from flying everywhere. Keep mixing until you have a very thick but soft dough that you can shape without it being sticky or crumbly.
Step 4: Adjust the Dough Texture
Check the consistency of your dough here. If it’s too sticky, sprinkle in a little more powdered sugar. If it feels dry and crumbly, add a few extra drops of heavy cream. The goal is a pliable dough that holds together easily but isn’t greasy.
Step 5: Color the Dough (Optional)
If you want to get a little creative, divide the dough into smaller batches and knead in a drop or two of gel food coloring for festive hues. Just knead gently until the color is evenly distributed but be careful not to overwork the dough.
Step 6: Roll into Ropes
Lightly dust your workspace with powdered sugar to prevent sticking, then roll each portion of dough into long ropes about 1/2 inch thick. These ropes form the shape of your adorable bite-sized mints.
Step 7: Cut into Pillow-Shaped Pieces
Use a small sharp knife or bench scraper to cut the ropes into tiny pieces roughly 1/2 inch wide. These shapes should resemble little pillows—perfectly bite-sized and charming.
Step 8: Let Mints Dry
Arrange the cut pieces on a parchment-lined baking sheet in a single layer, making sure they don’t touch. Allow them to rest at room temperature for at least 12 hours or overnight so they firm up on the outside yet remain tender inside—this drying time is crucial to get that ideal texture.
How to Serve Easy Butter Mints Recipe
Garnishes
For a festive flair, sprinkle your butter mints with edible glitter or dust a tiny bit of crushed peppermint candy on top after cutting but before they set. This adds a touch of sparkle and a slight crunch that complements the smooth texture wonderfully.
Side Dishes
These mints pair beautifully with a hot cup of coffee or tea, especially after a big meal when you want something sweet and refreshing but not overwhelming. Place a small bowl of these butter mints alongside your dessert platter or after-dinner drinks to impress your guests.
Creative Ways to Present
Presentation makes all the difference. Try packaging these Easy Butter Mints in small decorative tins or cellophane bags tied with ribbons for an irresistible homemade gift. You can also arrange them artistically on a serving plate using different colored batches for a vibrant holiday display that looks as good as it tastes.
Make Ahead and Storage
Storing Leftovers
Store any leftover butter mints in an airtight container at room temperature, where they will stay fresh and delicious for 3-4 days. Avoid refrigeration as the candies can dry out or become too firm.
Freezing
If you want to keep your mints longer, you can freeze them in an airtight container for up to 3 months. When ready to enjoy, simply thaw at room temperature to preserve their soft texture.
Reheating
Luckily, these butter mints don’t need reheating. Just let frozen or chilled mints come to room temperature naturally before serving to get that perfect creamy softness again.
FAQs
Can I use salted butter instead of unsalted?
While you can use salted butter, it’s best to stick with unsalted so you can control the saltiness precisely. The recipe’s small amount of fine sea salt balances the flavors perfectly without overwhelming the sweet or minty notes.
How long does it take for the mints to set properly?
Patience is key! Let your mints dry at room temperature for at least 12 hours or overnight. This resting period ensures the outsides firm up while the centers stay soft and creamy.
Can I make these mints without heavy cream?
Heavy cream adds that silky moisture and helps bind everything nicely, so it’s recommended. If you need a substitute, you can try milk, but the texture might not be as smooth or rich.
Are gel food colorings safe to eat?
Yes, gel food colorings are edible and commonly used in candy making. They won’t affect the taste and are perfect for adding vibrant colors to your mints without extra moisture.
What’s the best way to store these mints for gifting?
For gifting, package them in airtight containers or decorative tins and keep them at room temperature. Advise recipients to store them similarly to maintain freshness and softness for 3-4 days.
Final Thoughts
I can’t recommend this Easy Butter Mints Recipe enough if you want an effortless, delightful treat to brighten your day or impress your guests. It’s simple enough for beginners, yet elegant and delicious every time. Trust me, once you make these, they’ll become one of your favorite little indulgences that you’ll want to share again and again!
Print
Easy Butter Mints Recipe
- Prep Time: 15 minutes
- Cook Time: 0 minutes
- Total Time: 12 hours 15 minutes
- Yield: 8 servings (approximately 80-100 mints)
- Category: Candy
- Method: No-Cook
- Cuisine: American
Description
Easy Butter Mints are soft, melt-in-your-mouth candies infused with refreshing peppermint flavor. Made with simple ingredients like butter, powdered sugar, and heavy cream, these no-bake treats are perfect for holiday gifting or a sweet snack. They firm up after drying overnight for a delicate texture that’s both creamy and cool.
Ingredients
Butter Mint Dough
- 1/2 cup unsalted butter, softened
- 4 cups powdered sugar
- 2 tablespoons heavy cream
- 1/2 teaspoon peppermint extract
- 1/8 teaspoon fine sea salt
- Gel food coloring, optional
Instructions
- Cream the Butter and Salt: In a mixing bowl, beat the softened unsalted butter together with the fine sea salt until the mixture is smooth, creamy, and slightly lighter in color, ensuring a good base for the mints.
- Add Peppermint and Cream: Stir in the peppermint extract and heavy cream, then beat again until everything is fully combined and the mixture appears silky and smooth.
- Incorporate Powdered Sugar: Gradually mix in the powdered sugar, about a cup at a time, starting on low speed to prevent sugar dust from flying. Continue until a very thick, soft dough forms.
- Adjust Dough Texture: Check the consistency of the dough. If it’s sticky, add more powdered sugar a little at a time; if it feels dry or crumbly, add a few drops more heavy cream and mix thoroughly.
- Add Color (Optional): Divide the dough into separate portions if you want different colors. Knead a drop or two of gel food coloring into each portion until the color is evenly distributed.
- Shape the Dough: Lightly dust your work surface with powdered sugar and roll each portion of dough into long ropes about 1/2 inch thick.
- Cut Into Pieces: Using a small sharp knife or bench scraper, cut the ropes into tiny pillow-shaped pieces roughly 1/2 inch wide, separating the pieces so they don’t stick together.
- Dry the Mints: Arrange the cut mints in a single layer on a parchment-lined baking sheet. Let them dry at room temperature for at least 12 hours or overnight until they have a firm exterior but remain soft inside when bitten.
Notes
- The drying time is essential for achieving the perfect texture; do not skip or shorten it.
- Use gel food coloring rather than liquid to avoid altering the dough’s consistency.
- Store the butter mints in an airtight container once dried to maintain freshness.
- These mints are best enjoyed within a week for optimal flavor and texture.
- Adjust peppermint extract quantity according to your preference for flavor intensity.
