
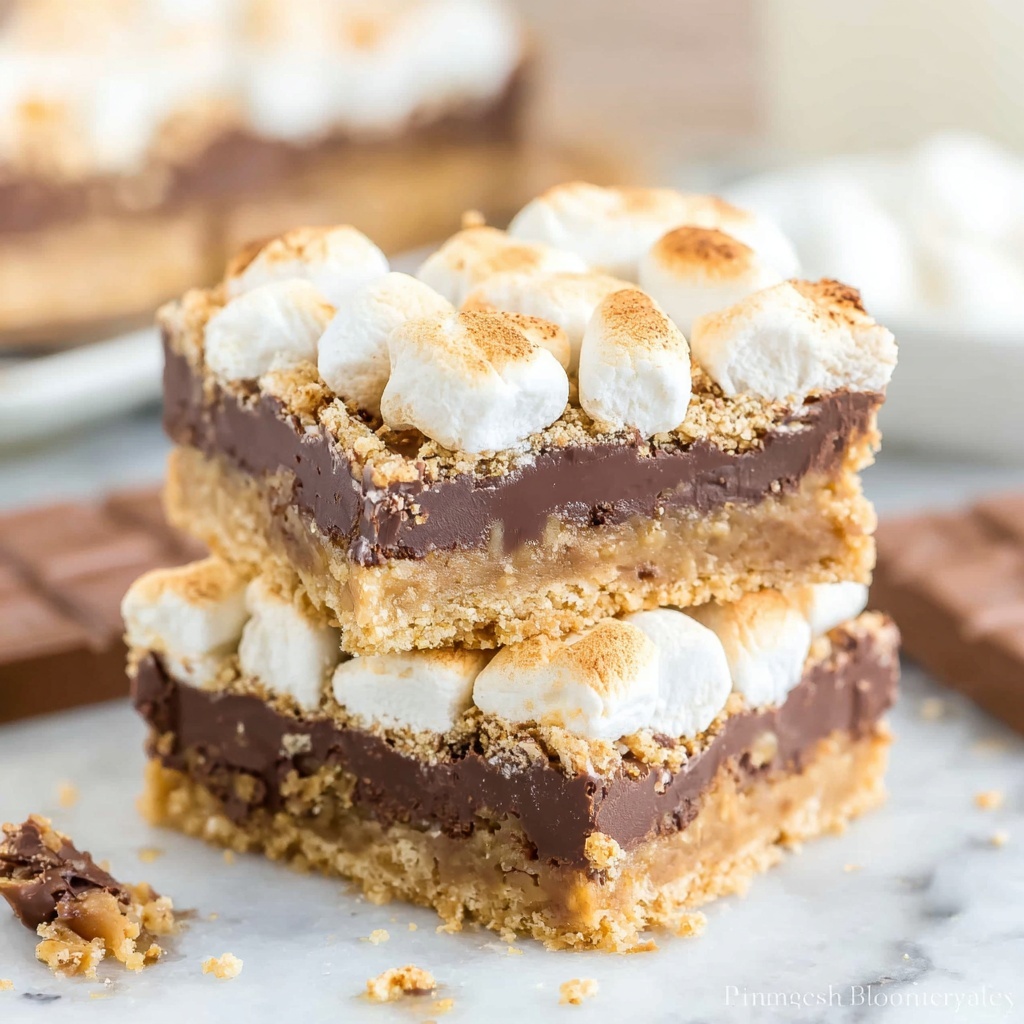
If you’re craving a nostalgic treat that brings campfire magic right into your kitchen, this S’mores Bar Recipe is exactly what you need. It’s a delightful twist on classic s’mores, layered into a convenient, shareable bar form that’s perfect for gatherings or any time you want a sweet indulgence. With buttery graham cracker crust, melted Hershey’s chocolate, and perfectly toasted mini marshmallows, this recipe combines the best textures and flavors in one irresistible dessert.
Ingredients You’ll Need
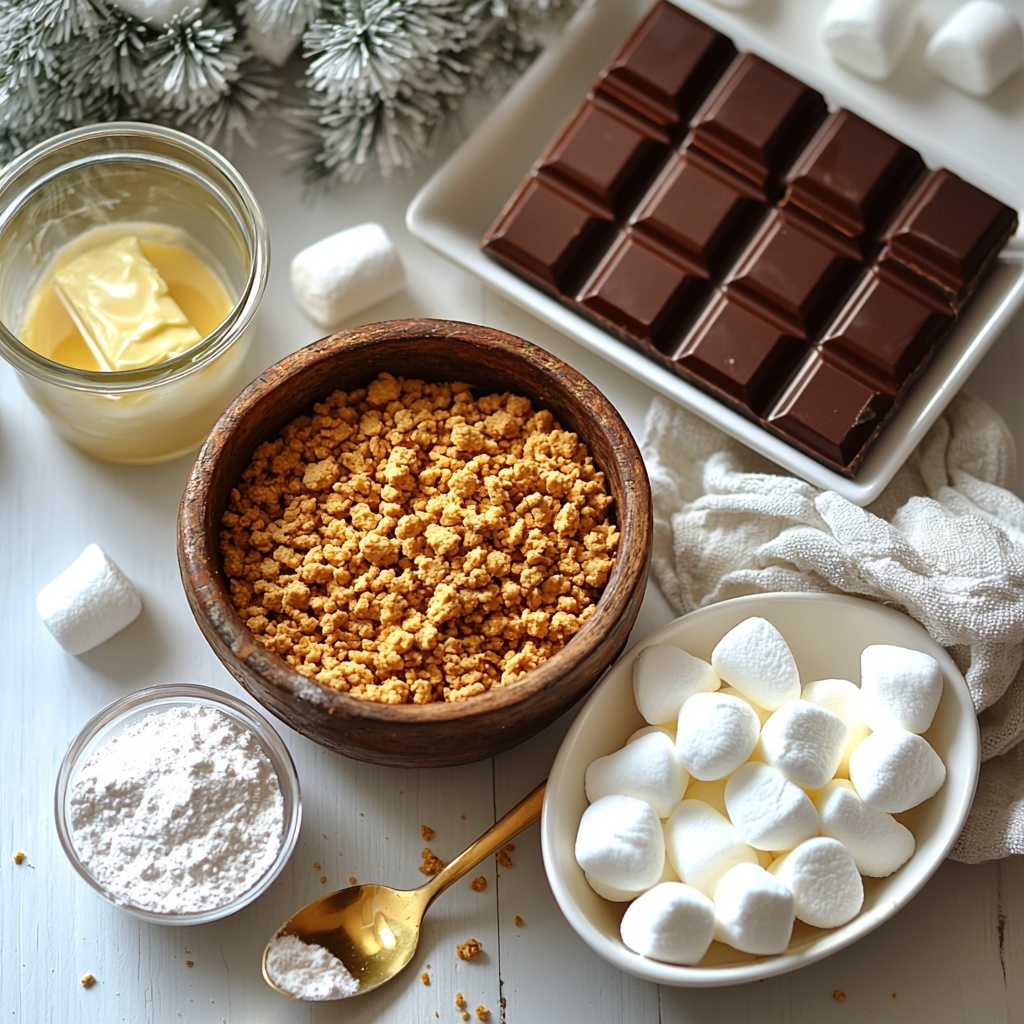
You don’t need a pantry full of fancy ingredients to whip up this S’mores Bar Recipe. Each component is simple but crucial, offering that perfect balance of crunchy, gooey, sweet, and buttery that makes s’mores so universally loved.
- 2 Cups graham cracker crumbs: Provides the crunchy, slightly sweet base that holds everything together.
- 8-12 Tablespoons butter (melted): Adds richness and moisture to help bind the crust firmly.
- 1/2 Cup powdered sugar: Sweetens the crust and gives it a touch of smooth texture.
- 4 Hershey Chocolate Bars (4.4 ounce each): The classic chocolate layer that melts beautifully under heat.
- 1 package mini marshmallows: The crowning glory, creating a toasted, gooey finish on top.
How to Make S’mores Bar Recipe
Step 1: Prepare the crust mixture
Start by preheating your oven to 350 degrees Fahrenheit because you want everything ready to go. In a medium bowl, mix the graham cracker crumbs, powdered sugar, and melted butter until everything is combined. The butter is key here, as it binds the crumbs together and adds that irresistible richness to your crust.
Step 2: Press and bake the crust
Grease a 9×13-inch baking pan with non-stick butter spray to prevent sticking. Transfer your crumb mixture into the pan and press it down firmly and evenly, not just on the bottom but slightly up the sides as well. This ensures every bite has that perfect crunchy graham base. Bake it for about 5-8 minutes until the edges start turning golden brown. Remember, the crust will harden more as it cools so don’t overbake.
Step 3: Add the chocolate layer
Once your crust has cooled slightly, line the entire surface with the Hershey chocolate bars. Don’t be shy—cover every inch so each bar slice gets a perfect chocolate hit. Place the pan back in the oven for about 3 minutes, just long enough for the chocolate to melt and become shiny but not liquid. This step sets you up perfectly for the next gooey layer.
Step 4: Top with marshmallows and broil
After the chocolate is shiny and melted, let the pan cool for a couple of minutes. Then, tightly pack mini marshmallows on top, crowding them closely together to get that signature melty, toasted effect. Switch your oven to broil and set the pan inside. This step demands your full attention—marshmallows can brown in mere minutes, so watch carefully! As soon as they get that golden-brown hue, immediately remove from the oven to avoid burning.
Step 5: Cool and serve
Allow your s’mores bars to cool completely, or better yet, pop them in the fridge to help them set firm for easier slicing. When it’s time to cut, use a sharp knife warmed under hot water and dried to prevent stickiness. This makes slicing the sticky bars much neater. Repeat warming the knife if needed to keep those cuts clean.
How to Serve S’mores Bar Recipe
Garnishes
While the bars themselves are a star, you can sprinkle a little crushed graham cracker or mini chocolate chips on top after broiling for extra texture. A light dusting of powdered sugar can add a touch of elegance when serving guests.
Side Dishes
Serve these bars alongside a scoop of vanilla ice cream or a dollop of whipped cream. Fresh berries can also offer a lovely contrast to all that sweetness while adding a pop of vibrant color to your dessert plate.
Creative Ways to Present
Instead of cutting into squares, try serving the S’mores Bar Recipe in individual mason jars layered with extra marshmallows and drizzle of chocolate syrup. You could also turn them into an interactive party treat by setting up a small stovetop or candle so guests can add more toasted marshmallows on top, creating their perfect s’mores experience.
Make Ahead and Storage
Storing Leftovers
Once cooled, cover your s’mores bars tightly with plastic wrap or store them in an airtight container. Keep them at room temperature for up to two days. Beyond that, refrigeration is best to keep the marshmallows from going stale or overly sticky.
Freezing
If you want to save some for later, these bars freeze very well. Wrap individual slices in plastic and place them in a freezer-safe container. Thaw in the refrigerator overnight and bring to room temperature before serving for best texture.
Reheating
To reheat, gently warm the bars in a low oven (around 300 degrees Fahrenheit) for 5-10 minutes. This softens the chocolate and marshmallow without burning them. Avoid microwaving to prevent the marshmallows from turning rubbery.
FAQs
Can I use a different type of chocolate?
Absolutely! While Hershey bars give the classic flavor, you can experiment with milk chocolate, semi-sweet, or even caramel-filled chocolates for inventive variations.
Are mini marshmallows necessary for this recipe?
Mini marshmallows are ideal because they toast evenly and melt beautifully. Regular-sized marshmallows can work but may require more careful monitoring under the broiler to avoid uneven toasting.
Is it possible to make this recipe gluten-free?
Yes! Simply substitute gluten-free graham cracker crumbs, which are widely available, and double-check that all other ingredients are gluten-free certified.
How do I prevent the marshmallows from burning under the broiler?
Keep a close eye on the broiler step, as marshmallows can go from perfectly toasted to burnt in seconds. Broil in short intervals, and be ready to remove the pan immediately when they reach a golden brown shade.
Can I make these bars ahead for a party?
They’re perfect for making ahead! Prepare everything up to the broiling step a few hours early, then toast the marshmallows just before serving. This will keep them fresh and irresistibly gooey.
Final Thoughts
This S’mores Bar Recipe is pure comfort food magic that everyone enjoys, no matter the season. It brings all the fun of camping indoors with minimal effort and maximum deliciousness. I promise, once you try these bars, you’ll have a new favorite treat to share with friends, family, or your own sweet cravings. So grab your ingredients and get ready to indulge in the ultimate nostalgic dessert!
Print
S’mores Bar Recipe
- Prep Time: 10 minutes
- Cook Time: 15 minutes
- Total Time: 25 minutes
- Yield: 16 servings
- Category: Dessert
- Method: Baking
- Cuisine: American
Description
This delicious S’mores Bar recipe combines a crunchy graham cracker crust, melted Hershey chocolate bars, and toasted mini marshmallows for an irresistible treat that’s perfect for parties or a cozy dessert. With simple ingredients and easy steps, you can recreate the classic campfire flavor right in your oven in under 30 minutes.
Ingredients
Crust
- 2 Cups graham cracker crumbs
- 8–12 Tablespoons melted butter
- 1/2 Cup powdered sugar
Topping
- 4 Hershey Chocolate Bars (4.4 ounce bars each)
- 1 package mini marshmallows
Instructions
- Preheat Oven: Preheat your oven to 350°F (175°C) to prepare for baking the crust.
- Prepare Pan: Grease a 9×13 inch baking pan with non-stick butter spray to prevent sticking.
- Mix Crust Ingredients: In a medium bowl, combine graham cracker crumbs, powdered sugar, and melted butter. Stir well until fully incorporated to form the crust mixture.
- Press Crust: Evenly spread the crust mixture into the prepared pan and firmly press it down with your fingers to pack it tightly along the bottom and sides.
- Bake Crust: Bake the crust in the oven for 5-8 minutes, or until the edges start turning golden brown. Remove and allow it to cool; the crust will harden as it cools.
- Layer Chocolate: Lay the Hershey chocolate bars evenly over the cooled crust, covering it completely.
- Melt Chocolate: Return the pan to the oven for about 3 minutes until the chocolate just begins to melt and becomes shiny.
- Cool Slightly: Let the chocolate layer cool for 1-2 minutes to settle.
- Add Marshmallows: Arrange mini marshmallows closely next to each other on top of the melted chocolate, covering the entire surface.
- Broil Marshmallows: Set the oven to broil and place the pan in. Watch carefully for about 2 minutes until the marshmallows brown to your liking. Remove immediately to prevent burning.
- Cool Completely: Allow the bars to cool fully. For easier cutting, refrigerate them to set the layers further.
- Serve: Using a sharp knife warmed under hot water and dried, slice the bars to serve. Repeat warming the knife if it becomes sticky to ensure clean cuts.
Notes
- Use melted butter to help bind the graham cracker crust when mixed with powdered sugar and crumbs.
- Watch the marshmallows closely while broiling to avoid burning or setting them on fire.
- Refrigerating the bars before cutting makes slicing easier and less sticky.
- Using a hot, dry knife helps make clean cuts without sticking.


