
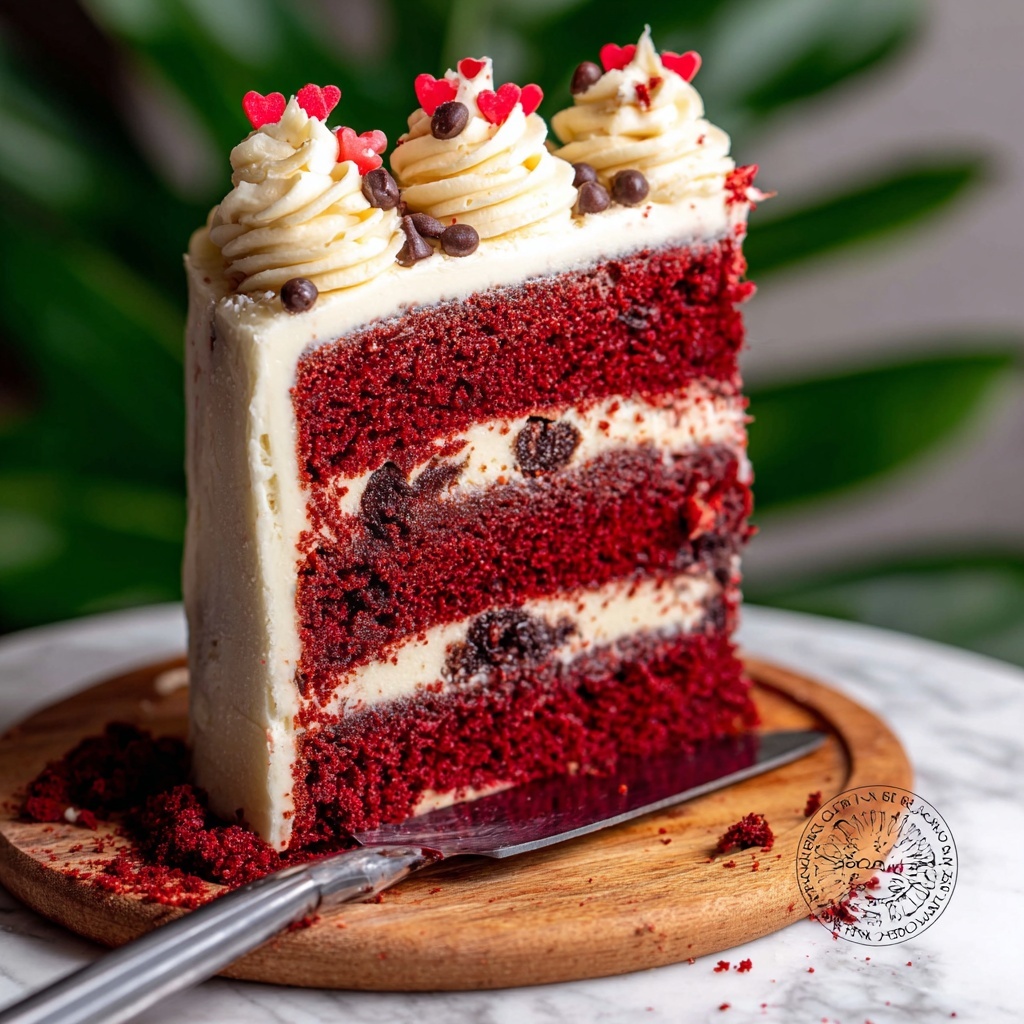
If you’re craving a show-stopping dessert that combines the classic charm of red velvet with pockets of melty chocolate, then this Red Velvet Chocolate Chip Cake Recipe is exactly what you need. It’s a vibrant, moist, and tender cake loaded with mini chocolate chips that melt into every bite, balanced perfectly by a luscious cream cheese frosting that’s whipped to silky perfection. Whether you’re celebrating a special occasion or just want to treat yourself and your loved ones, this cake offers the perfect mix of rich flavor, eye-catching color, and irresistible texture.
Ingredients You’ll Need
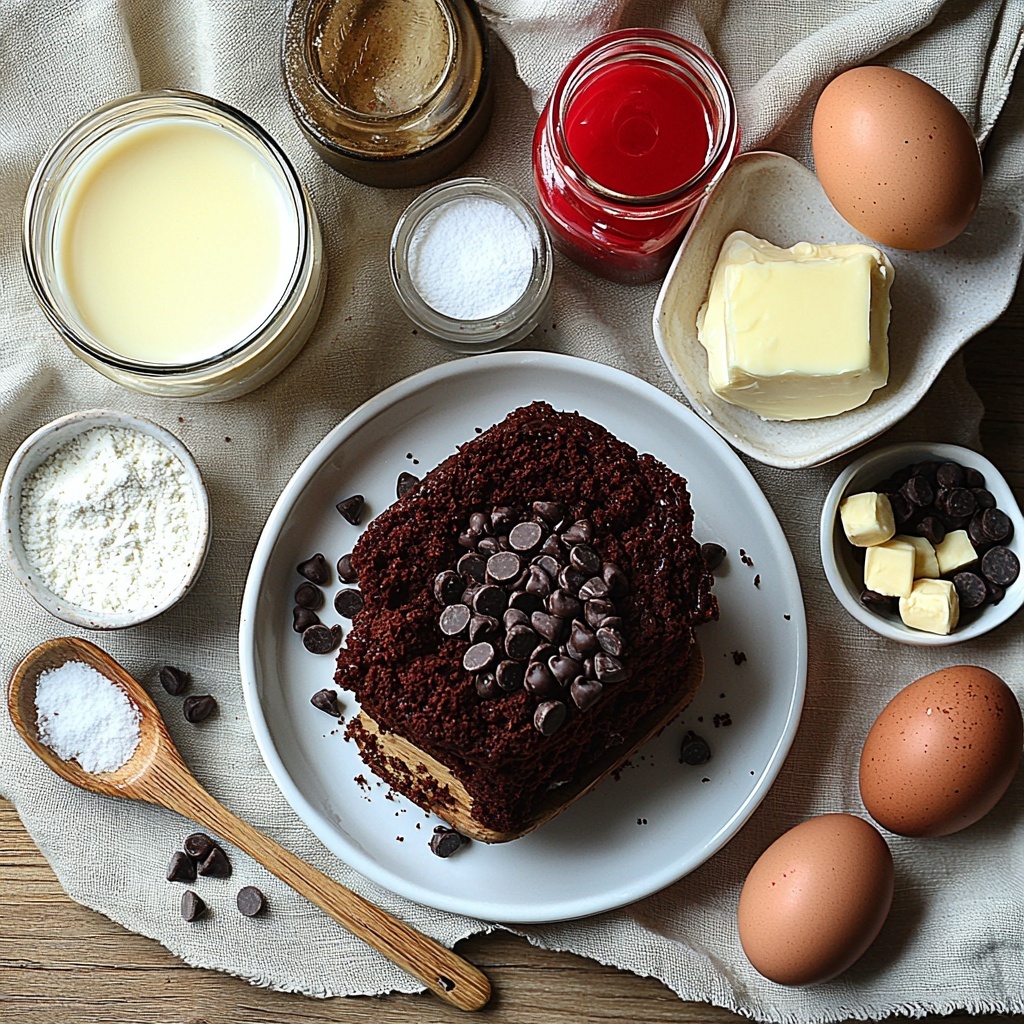
This Red Velvet Chocolate Chip Cake Recipe calls for simple pantry staples, but each ingredient plays a vital role—from the cocoa powder adding depth to the red color coming to life with a vivid food dye. The combination of butter and oil keeps the cake moist, while the sour cream ensures a tender crumb. And those mini chocolate chips? They bring juicy bursts of sweetness that make this cake truly unforgettable.
- All-purpose flour: Provides structure and a tender crumb when properly mixed.
- Unsweetened cocoa powder: Adds that subtle chocolate note essential to red velvet’s flavor profile; dutch process is ideal for smoothness.
- Baking powder and baking soda: Work together to ensure the cake rises fluffy and stays light.
- Salt: Balances sweetness and enhances flavors throughout the cake.
- Oil (canola or vegetable): Keeps the cake moist and tender without heaviness.
- Unsalted butter: Adds rich flavor and helps create a soft crumb when creamed with sugar.
- White granulated sugar: Sweetens the cake and helps with the soft texture.
- Pure vanilla extract: Lifts all flavors for a well-rounded taste.
- White vinegar: Reacts with baking soda to give the cake its delicate crumb and slight tang.
- Sour cream (or Greek yogurt): Adds moisture and tartness, contributing to that classic velvety texture.
- Large eggs: Bring structure while keeping the cake tender and rich.
- Red food gel dye: Infuses the cake with its iconic vibrant red hue safely and beautifully.
- Buttermilk: Keeps the cake moist and adds subtle tangy notes.
- Mini chocolate chips (for batter and filling): Deliver delightful chocolate bursts in every single bite.
- Cream cheese (for frosting): Perfectly tangy and creamy to complement the cake’s richness.
- Powdered sugar (for frosting): Sweetens and thickens frosting for that smooth finish.
How to Make Red Velvet Chocolate Chip Cake Recipe
Step 1: Prepare Your Pans and Preheat
Start by preheating your oven to 350℉. This ensures it’s ready once your batter is mixed. Next, prepare three 8-inch cake pans by spraying them with a nonstick baking spray, lining the bottoms with parchment paper, and spraying again. This double-layer prep guarantees your layers release perfectly after baking, saving you any frustration during cooling and decorating.
Step 2: Mix Dry Ingredients
In a medium bowl, sift together the all-purpose flour, cocoa powder, baking powder, baking soda, and salt. This step is essential to eliminate lumps, evenly distribute leavening agents, and keep the cocoa well blended. Having these dry ingredients ready helps ensure smooth incorporation later on.
Step 3: Cream Butter, Oil, and Sugar
Using a stand mixer or hand mixer, beat the unsalted butter, oil, and white granulated sugar on high speed for about 2 minutes. The mixture should turn pale and fluffy, creating a beautiful base for a light cake texture. This process incorporates air, which is key for the cake’s rise.
Step 4: Add the Wet Ingredients and Red Dye
Into your fluffy butter mixture, add the vanilla extract, vinegar, sour cream, eggs, and the red food gel dye. Mix on medium speed until everything is combined and you see that deep red color throughout. At this stage, the batter smells delightfully rich and inviting.
Step 5: Incorporate Dry Ingredients and Buttermilk
Add the sifted dry ingredients alternately with the buttermilk to the wet mixture, mixing on low speed just until combined. Be careful not to overmix, as that could make your cake dense. Finish by folding in the mini chocolate chips gently with a spatula to distribute them evenly without breaking their shape.
Step 6: Bake the Cake Layers
Divide the batter evenly among your three prepared pans. Smooth the tops so they bake evenly, then slide them into your preheated oven. Bake for 25 to 30 minutes, or until a toothpick inserted in the center comes out clean. The aroma of red velvet and chocolate filling your kitchen will be fabulous.
Step 7: Cool Completely
Allow the cakes to rest in the pans for about 10 minutes to set, then carefully transfer them to a wire rack to cool completely. This cooling step is crucial for the frosting to adhere smoothly later and to prevent it from melting.
Step 8: Make the Cream Cheese Frosting
Sift the powdered sugar into a large bowl and set aside. In another mixing bowl, beat the butter on high speed until fluffy, about 2 minutes. Add the cream cheese and continue mixing until the frosting is smooth and creamy. Incorporate the powdered sugar in two portions, mixing on low speed to avoid a sugar cloud, then add the vanilla and beat on high until silky and spreadable.
Step 9: Assemble Your Cake
Place a small dab of frosting on your serving board to anchor the first layer. Position the first cake layer, then spread about one cup of frosting evenly on top. Sprinkle a third of a cup of mini chocolate chips for an extra chocolate surprise. Repeat this with the second layer, and for the third layer, invert the cake so the flat bottom faces up for a smooth top.
Step 10: Chill and Decorate
Apply a thin crumb coat of frosting over the entire cake to trap any loose crumbs. Freeze the cake for 15 minutes to let the crumb coat set firmly. Finally, finish frosting the cake evenly with the remaining frosting and generously top with mini chocolate chips to create a beautifully textured finish that’s as delicious as it looks.
How to Serve Red Velvet Chocolate Chip Cake Recipe
Garnishes
For a stunning presentation, sprinkle extra mini chocolate chips or a light dusting of cocoa powder on top. Fresh berries or edible flowers can also add a fresh, colorful accent that contrasts beautifully with the cake’s rich red and white palette.
Side Dishes
This cake pairs wonderfully with a scoop of vanilla bean ice cream or a simple mixed berry compote. The cold creaminess and slight tartness balance the cake’s sweet richness and make the experience even more indulgent.
Creative Ways to Present
Try serving individual slices on a slate platter with drizzles of melted chocolate or raspberry coulis. Or, assemble mini layered parfaits using cake crumbs, frosting, and chocolate chips for a playful, interactive dessert alternative that guests will adore.
Make Ahead and Storage
Storing Leftovers
Cover leftover cake well with plastic wrap or store in an airtight container and refrigerate. Proper storage keeps the cake moist and the frosting fresh for up to 4 days. Bring it back to room temperature before serving to enjoy the full flavor and texture.
Freezing
You can freeze the cake layers (without frosting) wrapped tightly in plastic wrap and then foil for up to 3 months. Thaw overnight in the refrigerator before assembling. Alternatively, a fully assembled and frosted cake can be frozen for about 2 weeks, but be sure to wrap tightly to prevent freezer burn.
Reheating
Since this is a cake rather than a warmed dessert, simply bringing slices to room temperature is best. If desired, warm a slice gently in the microwave for 10-15 seconds to soften the frosting slightly before serving.
FAQs
Can I use regular cocoa powder instead of dutch process?
Yes, but your cake’s flavor and color may be slightly different. Dutch process cocoa is milder and less acidic, which complements the tangy elements in red velvet best. If you substitute regular cocoa, reduce the baking soda by half to balance the acidity.
Can I make this cake vegan or dairy-free?
To make a vegan or dairy-free version, substitute the butter with vegan butter or coconut oil, use a plant-based milk mixed with vinegar instead of buttermilk, and replace the eggs with flax or chia egg substitutes. The result will be delicious but may vary in texture slightly.
Why do I need both baking powder and baking soda?
They serve different roles: baking soda reacts with the acidic ingredients like vinegar and buttermilk to create lift, while baking powder provides additional rising power. Using both helps achieve the perfect fluffy texture.
How can I avoid the cake layers from doming or cracking?
Make sure to level your batter evenly in the pans and bake at the recommended temperature. Overmixing can create air pockets that cause cracks, so mix just until combined. Using an oven thermometer ensures accurate baking temperature.
Can I replace mini chocolate chips with regular-sized chips?
You can, but mini chips distribute more evenly and create delightful chocolate bursts throughout the cake. Larger chips might sink or create uneven pockets, changing the cake’s texture experience.
Final Thoughts
This Red Velvet Chocolate Chip Cake Recipe is truly a winner for anyone who loves a tender, flavorful cake with delightful little pockets of chocolate joy. Its vibrant color, rich yet balanced taste, and luscious cream cheese frosting make it perfect for celebrations or just when you want to impress your friends and family with a homemade treat. Give this recipe a try; I promise it will become one of your favorite go-to cakes in no time!
Print
Red Velvet Chocolate Chip Cake Recipe
- Prep Time: 30 minutes
- Cook Time: 30 minutes
- Total Time: 2 hours 25 minutes
- Yield: 16 servings
- Category: Dessert
- Method: Baking
- Cuisine: American
Description
This Red Velvet Chocolate Chip Cake is a luscious three-layer cake combining the classic mild cocoa flavor of red velvet with delightful mini chocolate chips throughout. It’s frosted with a creamy, tangy cream cheese frosting studded with more chocolate chips, making it an irresistible dessert perfect for celebrations or any special occasion. The cake layers are moist and fluffy, balanced with just the right amount of sweetness and a vibrant red color achieved with gel food dye.
Ingredients
Dry Ingredients
- 3 1/2 cups All-purpose flour
- 1/4 cup Unsweetened cocoa powder (dutch process preferred)
- 2 tsp Baking powder
- 1/2 tsp Baking soda
- 1 tsp Salt
Wet Ingredients and Cake Batter
- 1/2 cup Oil (canola or vegetable)
- 1/2 cup Unsalted butter (room temperature)
- 1 3/4 cup White granulated sugar
- 1 tsp Pure vanilla extract
- 1 tsp White vinegar
- 1/3 cup Sour cream (room temperature or Greek yogurt)
- 4 Large eggs (room temperature)
- 1 tsp Red food gel dye (Americolor super red recommended)
- 1 cup Buttermilk (room temperature)
- 1 1/2 cups Mini chocolate chips
Cream Cheese Frosting
- 2 cups Unsalted butter (room temperature)
- 8 oz Cream cheese (room temperature)
- 5 cups Powdered sugar (sifted)
- 1 tsp Pure vanilla extract
- 1/2 cup Mini chocolate chips (for filling and decoration)
Instructions
- Preheat and prepare pans: Preheat your oven to 350℉. Spray three 8-inch cake pans generously with baking nonstick spray. Line the bottoms of each pan with parchment paper and spray again to ensure easy release after baking. Set aside.
- Sift dry ingredients: In a medium bowl, sift together the all-purpose flour, unsweetened cocoa powder, baking powder, baking soda, and salt. This ensures even mixing and light texture. Set aside.
- Beat butter, oil, and sugar: Using a mixer fitted with a large bowl, beat the room temperature unsalted butter, oil, and white granulated sugar on high speed for about 2 minutes until the mixture becomes very pale in color and fluffy, incorporating plenty of air.
- Add wet flavorings and eggs: To the fluffy butter mixture, add the vanilla extract, white vinegar, sour cream, eggs, and red food gel dye. Mix again on medium speed until all ingredients are fully combined and the batter is smooth and evenly colored.
- Combine dry and wet ingredients: Add the sifted dry ingredients along with the buttermilk to the batter. Mix on low speed until just combined to avoid overworking the batter. Stop mixing and fold gently with a rubber spatula to finish incorporation.
- Fold in chocolate chips: Add the mini chocolate chips into the batter and carefully fold them in using the spatula to evenly distribute without breaking them.
- Divide and bake: Evenly divide the cake batter into the three prepared pans, smoothing the tops evenly with a spatula. Bake in the preheated oven for 25 to 30 minutes, or until a toothpick inserted in the center comes out clean.
- Cool the cakes: Remove the pans from the oven and allow the cakes to rest in the pans for 10 minutes. Then, carefully transfer the cakes to a wire cooling rack and cool completely before frosting.
- Prepare the cream cheese frosting: In a large bowl, sift the powdered sugar and set aside. In a separate mixing bowl, beat the room temperature unsalted butter on high speed for 2 minutes until creamy. Scrape the bowl and add the cream cheese, beating again for 1 minute until smooth with no butter lumps.
- Mix frosting ingredients: Add half of the sifted powdered sugar to the butter and cream cheese mixture and mix on low until nearly combined. Add the remaining powdered sugar and continue mixing on low to fully combine. Add the vanilla extract and beat on high speed until the frosting is smooth, creamy, and spreadable.
- Assemble the cake: Place a small dab of frosting on your cake board or serving plate and set the first cake layer on top.
- Fill cake layers: Spread 1 cup of cream cheese frosting evenly over the first layer. Sprinkle about 1/3 cup of mini chocolate chips on top of the frosting for added texture and chocolate bursts.
- Repeat layering: Add the second cake layer on top and repeat spreading frosting and sprinkling mini chocolate chips. For the third layer, invert the cake so the bottom is facing up for a flat surface.
- Crumb coat and chill: Apply a thin, light layer of frosting all over the assembled cake to seal in the crumbs. Place the cake in the freezer for 15 minutes to set this crumb coat.
- Final frosting and decorate: Remove the cake from the freezer and apply the remaining frosting evenly over the sides and top of the cake. Decorate the cake by sprinkling additional mini chocolate chips on top for a festive finish.
Notes
- Use room temperature ingredients to ensure smooth mixing and optimal texture.
- Dutch processed cocoa powder gives a richer chocolate flavor and deeper color.
- Gel food coloring provides a more vibrant red color compared to liquid colorings.
- Ensure cakes are completely cooled before frosting to prevent melting.
- Freezing the cake after the crumb coat helps create a clean frosting finish.
- You can substitute Greek yogurt for sour cream if preferred.
- Store the finished cake refrigerated in an airtight container for up to 4 days.


