
“`html
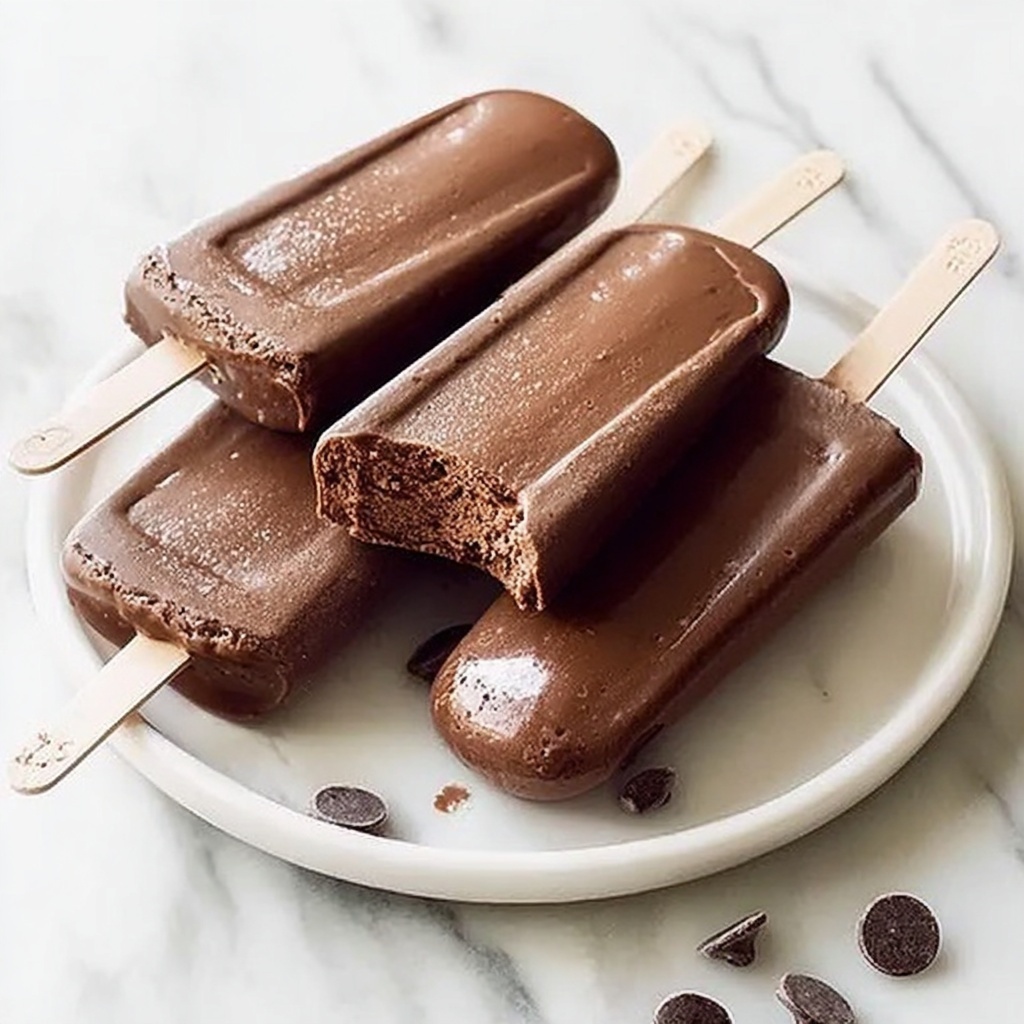
If you’re craving a treat that feels indulgent but still aligns with your health goals, this Healthy Fudgesicles Recipe is here to delight you. These fudgy, creamy frozen treats combine rich cocoa, natural sweeteners, and wholesome nut butter, creating popsicles that are not only deeply satisfying but also nourishing. Whether you’re a kid or just a kid at heart, these homemade delights will quickly become your go-to dessert on sunny days or any time you need a cool chocolate fix.
Ingredients You’ll Need
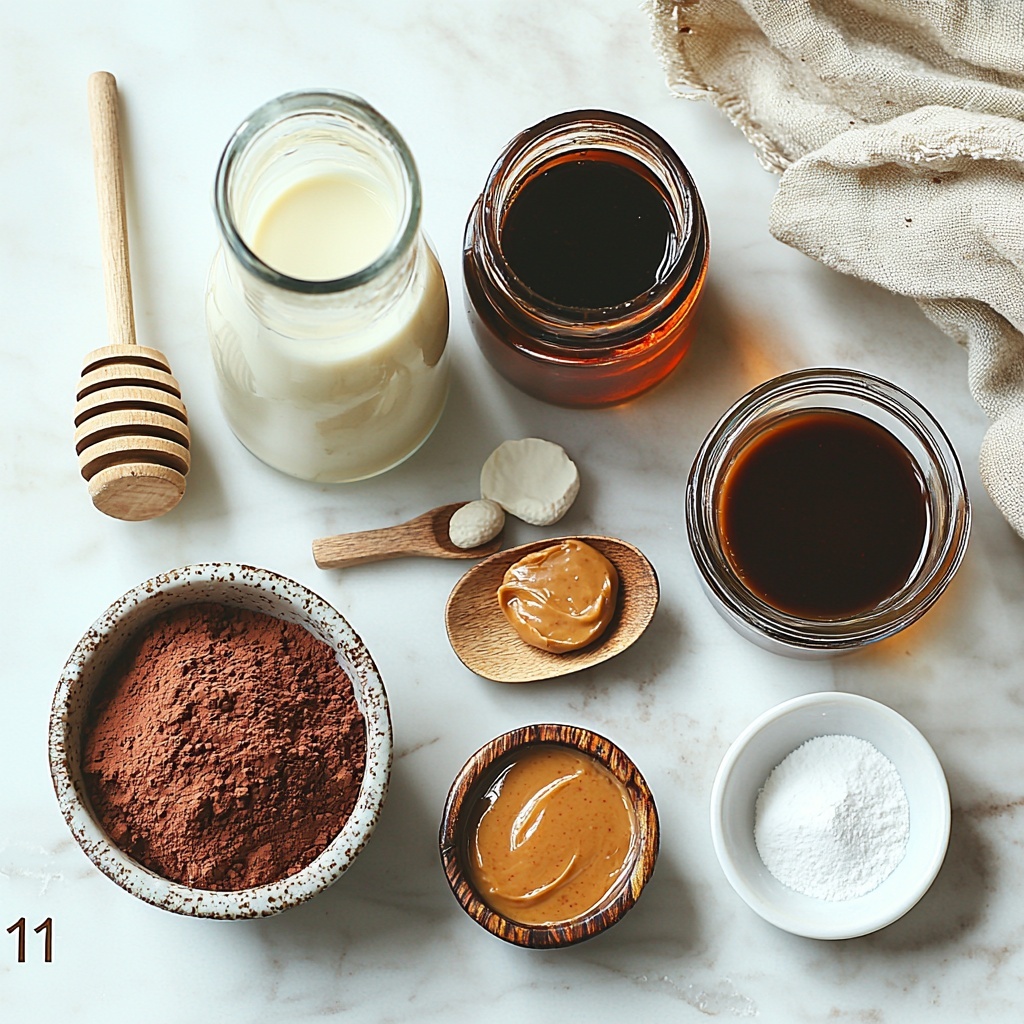
The magic of this Healthy Fudgesicles Recipe lies in its simple, honest ingredients. Each one plays a vital role, from creating that velvety texture to delivering rich chocolate flavor without any artificial fuss.
- 2 cups unsweetened almond milk: A smooth, dairy-free base that keeps these fudgesicles light yet creamy.
- 1/2 cup unsweetened cocoa powder: The heart of the chocolate flavor, packed with antioxidants and intensity.
- 1/3 cup pure maple syrup or honey: Natural sweetness that balances bitterness without overpowering.
- 1/4 cup creamy peanut butter or almond butter: Adds a luscious richness and a subtle nutty undertone.
- 1 teaspoon vanilla extract: Enhances and rounds out the chocolate notes beautifully.
- 1/8 teaspoon salt: Just a pinch to awaken all the flavors and deepen the taste.
- 1 tablespoon cornstarch or arrowroot powder: The secret to that perfect thick and glossy consistency.
How to Make Healthy Fudgesicles Recipe
Step 1: Whisk Ingredients Together
Begin by combining the almond milk, cocoa powder, maple syrup, nut butter, vanilla extract, salt, and cornstarch in a medium saucepan. Whisk everything together until the mixture is completely smooth with no lumps in sight. This step ensures the flavors meld perfectly and sets the stage for a luscious fudgy texture.
Step 2: Cook the Mixture
Place your saucepan over medium heat and cook the mixture, whisking constantly to prevent any sticking. After about 5 to 7 minutes, you will notice the mixture thickening slightly, becoming smooth and glossy. Be careful not to let it boil vigorously — gentle heat preserves the creaminess and prevents the cornstarch from clumping.
Step 3: Cool the Mixture
Once thickened, remove the saucepan from the heat and allow it to cool for 5 to 10 minutes. This cooling time helps the fudgesicle mixture to set up just right without melting your molds when poured.
Step 4: Pour and Freeze
Pour the cooled mixture evenly into popsicle molds, making sure to leave a little bit of space at the top to allow for expansion as the fudgesicles freeze. Insert the sticks and pop them into the freezer for at least 4 to 6 hours, or until they’re completely firm.
Step 5: Release and Enjoy
To enjoy your creamy, delicious fudgesicles, briefly run the molds under warm water—just enough to loosen the edges—and gently pull the fudgesicles free. Now you’ve got a healthy frozen treat that feels like a special indulgence!
How to Serve Healthy Fudgesicles Recipe
Garnishes
These fudgesicles shine on their own, but you can make them extra special by rolling the edges in finely chopped nuts or sprinkling a few mini dark chocolate chips before freezing. A light dusting of sea salt on top can also create an irresistible sweet-salty bite.
Side Dishes
To keep things light and balanced, serve these Healthy Fudgesicles alongside fresh berry salads or a handful of sliced banana for added natural sweetness and texture. They also pair wonderfully with a crisp mint leaf to refresh your palate after each bite.
Creative Ways to Present
For a fun presentation, try layering the fudgesicle mixture with swirls of berry puree or yogurt in the molds before freezing, creating beautiful marbled popsicles. You can also use decorative popsicle molds shaped like stars or hearts to bring a playful touch to your dessert table.
Make Ahead and Storage
Storing Leftovers
If you happen to have any Healthy Fudgesicles Recipe treats left after delighting friends and family, store them in an airtight container in the freezer to maintain their creamy texture. They will stay fresh and delicious for up to 2 weeks, giving you plenty of time to savor these chocolatey gems.
Freezing
Freezing is essential for this recipe’s success. Once poured into molds and inserted with sticks, be sure to freeze the fudgesicles for at least 4 to 6 hours. This ensures they become firm enough to pop out easily and hold their shape while eating.
Reheating
As these are frozen treats, reheating is not applicable. Instead, let your fudgesicles soften at room temperature for 5 minutes before serving if they are too hard on a very cold day. This makes them easier to bite into without melting too quickly.
FAQs
Can I use a different milk instead of almond milk?
Absolutely! Light coconut milk works beautifully and adds extra creaminess without overpowering the chocolate. You could also try oat milk or any other plant-based milk you prefer.
Is it possible to make these fudgesicles sugar-free?
Yes! Simply substitute the maple syrup or honey for a sugar-free maple syrup alternative to cut down on sugars while keeping the natural sweetness intact.
Can I add mix-ins like nuts or chocolate chips?
Definitely! Mini dark chocolate chips or chopped nuts can add a delightful textural contrast. Stir them in before pouring the mixture into molds for a little surprise in every bite.
How long do these fudgesicles last in the freezer?
Stored properly in an airtight container, your Healthy Fudgesicles Recipe treats will stay fresh and delicious for up to 2 weeks.
What if I don’t have cornstarch or arrowroot powder?
Cornstarch or arrowroot is key to thickening this recipe and achieving that fudgy texture. If unavailable, you might try a small amount of tapioca starch or flour, but the texture could be slightly different.
Final Thoughts
There is something truly special about a homemade treat that manages to feel indulgent while being thoughtfully healthy—and this Healthy Fudgesicles Recipe does exactly that. It’s simple, fun to make, and incredibly satisfying. So next time you want to cool down with a rich chocolate delight, dive into this recipe and treat yourself to something truly delightful.
“`
Print
Healthy Fudgesicles Recipe
- Prep Time: 10 minutes
- Cook Time: 7 minutes
- Total Time: 6 hours 17 minutes
- Yield: 6 fudgesicles
- Category: Dessert
- Method: Freezing
- Cuisine: American
- Diet: Gluten Free
Description
These Healthy Fudgesicles are a deliciously creamy and dairy-free frozen treat made with wholesome ingredients like almond milk, cocoa powder, and natural sweeteners. Perfect for a guilt-free dessert or snack, they offer a subtle sweetness and rich chocolate flavor without added refined sugars. Easy to prepare and freeze, these fudgesicles make a refreshing, nutritious alternative to traditional ice cream bars.
Ingredients
Main Ingredients
- 2 cups unsweetened almond milk
- 1/2 cup unsweetened cocoa powder
- 1/3 cup pure maple syrup or honey
- 1/4 cup creamy peanut butter or almond butter
- 1 teaspoon vanilla extract
- 1/8 teaspoon salt
- 1 tablespoon cornstarch or arrowroot powder
Instructions
- Combine Ingredients: In a medium saucepan, whisk together the almond milk, cocoa powder, maple syrup, nut butter, vanilla extract, salt, and cornstarch until the mixture is completely smooth, ensuring there are no lumps.
- Cook Mixture: Place the saucepan over medium heat and cook the mixture while whisking constantly for 5 to 7 minutes until it thickens slightly and becomes smooth and glossy. Be careful not to let it boil vigorously, as this could affect the texture.
- Cool the Mixture: Remove the saucepan from heat and allow the chocolate mixture to cool for 5 to 10 minutes, bringing it closer to room temperature before freezing.
- Pour into Molds: Evenly pour the cooled mixture into popsicle molds, leaving a little space at the top to allow for expansion during freezing. Insert the popsicle sticks into each mold.
- Freeze: Place the molds in the freezer and freeze for at least 4 to 6 hours, or until the fudgesicles are completely firm and solid.
- Unmold and Serve: To release the fudgesicles, briefly run the molds under warm water to loosen them, then gently pull out each fudgesicle. Enjoy immediately or store in an airtight container for up to 2 weeks in the freezer.
Notes
- For extra creaminess, substitute light coconut milk in place of almond milk.
- You can use a sugar-free maple syrup substitute to reduce sugar content further.
- Add mini dark chocolate chips into the mixture for added texture if desired.
- Store the fudgesicles in an airtight container in the freezer for up to 2 weeks to maintain freshness and prevent freezer burn.


