
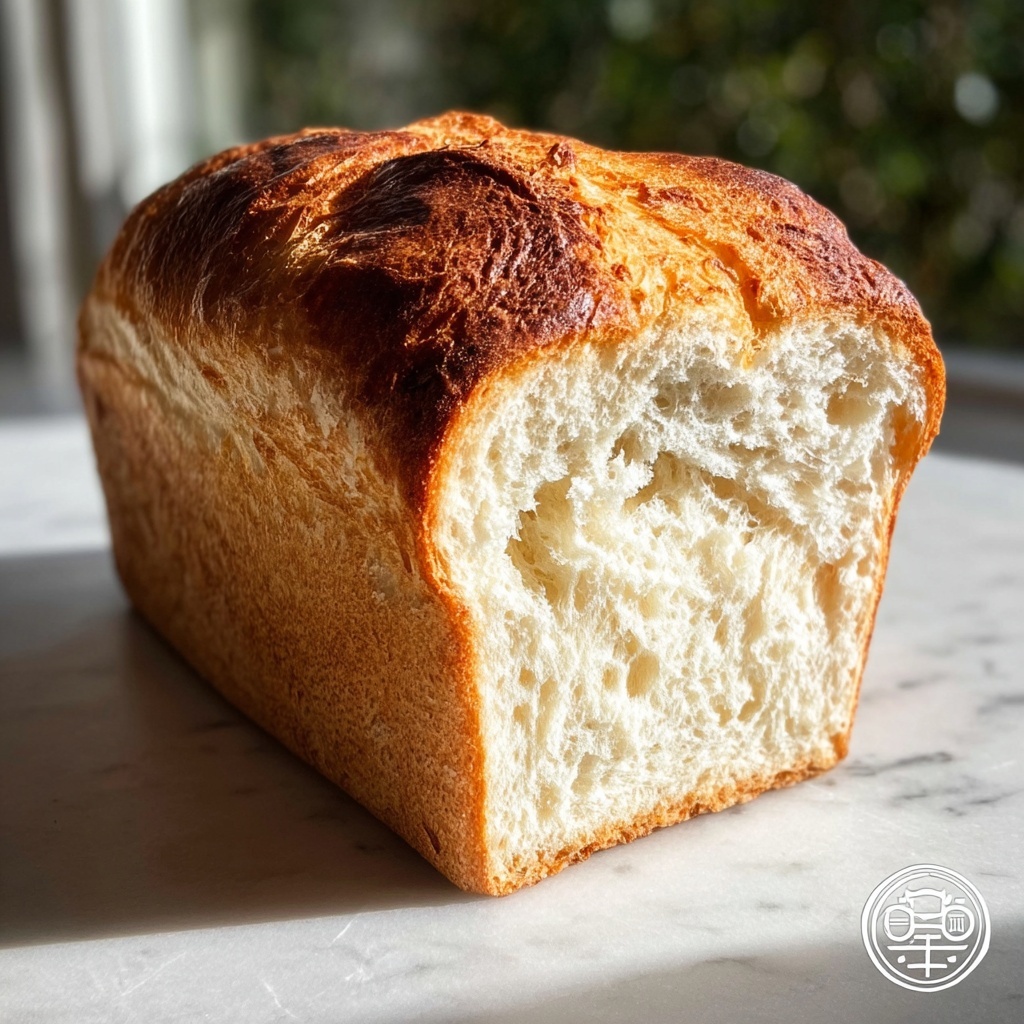
If you’ve been searching for a comforting, homemade bread that fits effortlessly into a gluten-free lifestyle, then you’re in for a real treat with this Classic White Gluten-Free Sandwich Bread Recipe. This loaf isn’t just about accommodating dietary needs—it’s about rediscovering that perfect, soft, and slightly chewy texture that makes every sandwich memorable. The gentle rise, golden crust, and delicate crumb bring warmth and nostalgia to your kitchen, making this bread a new favorite to share with family and friends.

Ingredients You’ll Need
The magic behind this Classic White Gluten-Free Sandwich Bread Recipe lies in its simple but powerful ingredients. Each one plays a crucial role, whether it’s the structure, flavor, or moisture of the bread. Let’s break down why these pantry staples are so essential.
- 2 cups gluten-free all-purpose flour: The foundation that ensures a light texture without gluten’s elasticity.
- 1 tablespoon sugar: Feeds the yeast and adds a subtle hint of sweetness to balance the savory elements.
- 1 teaspoon salt: Enhances flavor and controls yeast activity for a perfectly risen loaf.
- 1 tablespoon active dry yeast: The leavening agent that helps the bread rise, creating that fluffy crumb.
- 1 cup warm water: Activates the yeast and hydrates the flour, bringing the dough together smoothly.
- 2 tablespoons olive oil: Adds tenderness and moisture, keeping the bread soft longer.
- 2 eggs: Provide richness and structure, helping the bread hold together beautifully.
How to Make Classic White Gluten-Free Sandwich Bread Recipe
Step 1: Prepare Your Pan and Oven
Begin by preheating your oven to 375°F (190°C) to ensure it’s at just the right temperature for a perfect bake. Grease a loaf pan generously; this step helps the bread release effortlessly once it’s baked and contributes to that beautiful crust formation.
Step 2: Mix Dry Ingredients
In a large mixing bowl, combine the gluten-free all-purpose flour, sugar, salt, and active dry yeast. Mixing these first evenly distributes the yeast throughout the flour, setting the stage for balanced rising and consistent texture in your bread.
Step 3: Add Wet Ingredients and Form Dough
Next, pour in the warm water, olive oil, and eggs. Stir until you achieve a smooth, cohesive dough. Because gluten-free dough can be a bit stickier and less elastic than traditional wheat dough, don’t worry if it looks a little different—it’s exactly how it should be for this recipe!
Step 4: Transfer Dough to Pan
Carefully transfer your dough into the greased loaf pan. Use a spatula to smooth the top evenly—this will help your bread bake in a uniform shape and rise nicely without any peaks or troughs.
Step 5: Bake Until Golden and Hollow-Sounding
Bake your bread for about 40 minutes. You’ll know it’s done when the crust turns a gorgeous golden brown and sounds hollow when you tap the bottom gently. This classic test is perfect for ensuring the crumb has baked through without drying out.
Step 6: Cool to Perfection
Allow your bread to cool in the pan for 10 minutes—this resting period helps it set, making it easier to remove. Then transfer it to a wire rack to cool completely so the crumb firms up just right, ready for slicing and savoring.
How to Serve Classic White Gluten-Free Sandwich Bread Recipe
Garnishes
This bread’s subtle flavors make it a perfect stage for a variety of toppings. Try a light smear of herb butter, a dash of garlic oil, or a sprinkle of seeds like sesame or poppy for added texture and flair.
Side Dishes
Pair your sandwich bread with vibrant salads, hearty soups, or even a creamy bowl of chili. It’s sturdy yet soft texture holds up to dips and spreads, making every bite satisfying and complete.
Creative Ways to Present
For a fun twist, turn slices into toasted crostinis topped with smashed avocado and cherry tomatoes or create mini stuffed sandwiches filled with seasonal veggies and your favorite cheeses. This recipe provides a versatile canvas for all your tasty ideas.
Make Ahead and Storage
Storing Leftovers
To keep your bread fresh, store it in an airtight container or bread box at room temperature. It stays soft and enjoyable for up to two days, perfect for quick sandwiches or toast the next morning.
Freezing
If you want to enjoy your Classic White Gluten-Free Sandwich Bread Recipe over a longer period, slice it first and place the slices in a freezer bag. This way, you can pull out exactly what you need without thawing the whole loaf!
Reheating
Warm slices in a toaster or lightly in the oven for just a few minutes to revive that fresh-baked feel. Reheating enhances the aroma and makes your gluten-free bread taste just like the day it came out of the oven.
FAQs
Is this bread recipe suitable for beginners?
Absolutely! The Classic White Gluten-Free Sandwich Bread Recipe is straightforward and uses simple ingredients, making it perfect for anyone new to gluten-free baking.
Can I substitute the olive oil with another fat?
Yes, you can use melted butter or a neutral oil like canola. Olive oil adds a subtle flavor and moisture, but alternatives will work just fine depending on your preference.
How do I know if my bread is fully baked?
The best sign is a golden brown crust that sounds hollow when tapped on the bottom. This indicates the interior is cooked through without being doughy.
Can I use a gluten-free flour blend other than all-purpose?
For best results, a gluten-free all-purpose flour blend designed for baking is recommended. Some blends include xanthan gum which helps with texture; if yours doesn’t, you might need to add a binding agent.
What can I do if my bread crumbles too much?
Make sure to measure your flour correctly and avoid adding too much. Also, the eggs and oil in this recipe help hold everything together; don’t skip them! Proper cooling on a wire rack before slicing is also key.
Final Thoughts
There’s nothing quite like the joy of slicing into a homemade loaf of bread, especially when it’s a reliable, soft, and flavorful gluten-free recipe. Give this Classic White Gluten-Free Sandwich Bread Recipe a try and you might just find yourself baking it again and again. It’s perfect for everyday meals or special sandwiches to share with loved ones—comfort food that feels like a warm hug every time.
Print
Classic White Gluten-Free Sandwich Bread Recipe
- Prep Time: 10 minutes
- Cook Time: 40 minutes
- Total Time: 55 minutes
- Yield: 1 loaf (about 8 slices)
- Category: Bread
- Method: Baking
- Cuisine: American
- Diet: Gluten Free
Description
This Classic White Sandwich Bread recipe delivers a soft, fluffy loaf perfect for sandwiches, made with gluten-free all-purpose flour for those with gluten sensitivities. Combining simple ingredients such as yeast, eggs, and olive oil, this easy-to-make bread bakes to a beautifully golden crust and tender crumb, ideal for everyday meals and snacks.
Ingredients
Dry Ingredients
- 2 cups gluten-free all-purpose flour
- 1 tablespoon sugar
- 1 teaspoon salt
- 1 tablespoon active dry yeast
Wet Ingredients
- 1 cup warm water
- 2 tablespoons olive oil
- 2 eggs
Instructions
- Preheat and Prepare: Preheat your oven to 375°F (190°C) and grease a loaf pan to prevent sticking during baking.
- Mix Dry Ingredients: In a mixing bowl, combine the gluten-free flour, sugar, salt, and active dry yeast evenly to form the base of your dough.
- Add Wet Ingredients and Mix: Pour in the warm water, olive oil, and eggs to the dry ingredients. Stir until a smooth and consistent dough forms, ensuring everything is well incorporated.
- Shape and Transfer: Transfer the dough into the prepared loaf pan and use a spatula to smooth the top for even baking and a neat finish.
- Bake the Bread: Place the loaf pan in the preheated oven and bake for about 40 minutes or until the bread turns a golden brown and sounds hollow when tapped, indicating it is fully cooked.
- Cool the Bread: Remove the bread from the oven, let it cool in the pan for 10 minutes to stabilize, then transfer to a wire rack to cool completely before slicing.
Notes
- Make sure the water is warm, not hot, to activate the yeast without killing it.
- Allowing the bread to cool completely before slicing prevents it from becoming gummy.
- This bread is gluten-free, making it a great option for those with gluten intolerance or celiac disease.
- You can store the bread in an airtight container at room temperature for up to 3 days or freeze slices for longer storage.
- For a dairy-free version, confirm that your gluten-free flour blend and yeast are dairy-free, as eggs and olive oil are naturally dairy-free.


