
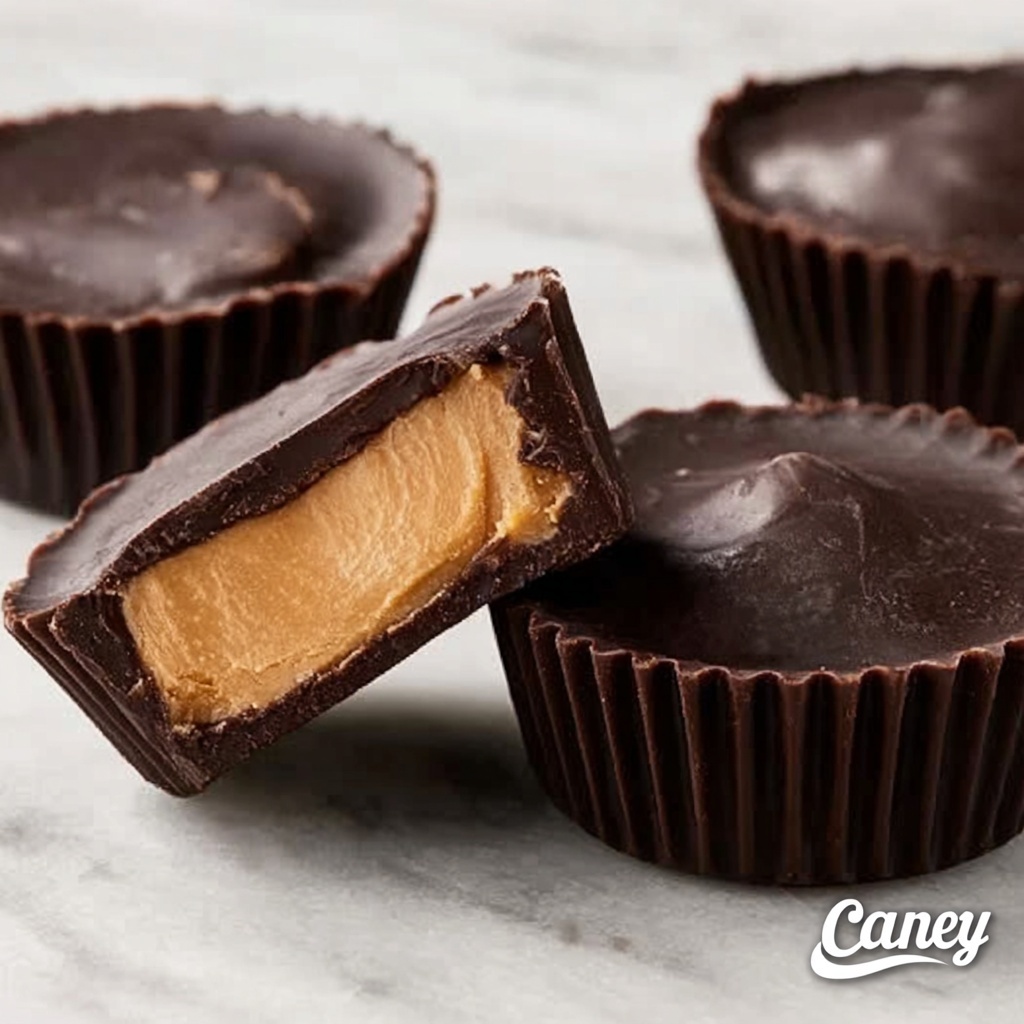
If you have a sweet tooth and love classic candy flavors, this Peanut Butter Cups Recipe is an absolute must-try. Imagine rich, creamy peanut butter embraced by layers of luscious semi-sweet chocolate—perfectly balanced to satisfy your cravings with just the right amount of sweetness and texture. These homemade treats are surprisingly simple to make but taste like something you’d find in a fancy chocolatier’s shop. Whether you’re treating yourself or sharing with friends, these peanut butter cups bring pure joy with every bite.
Ingredients You’ll Need
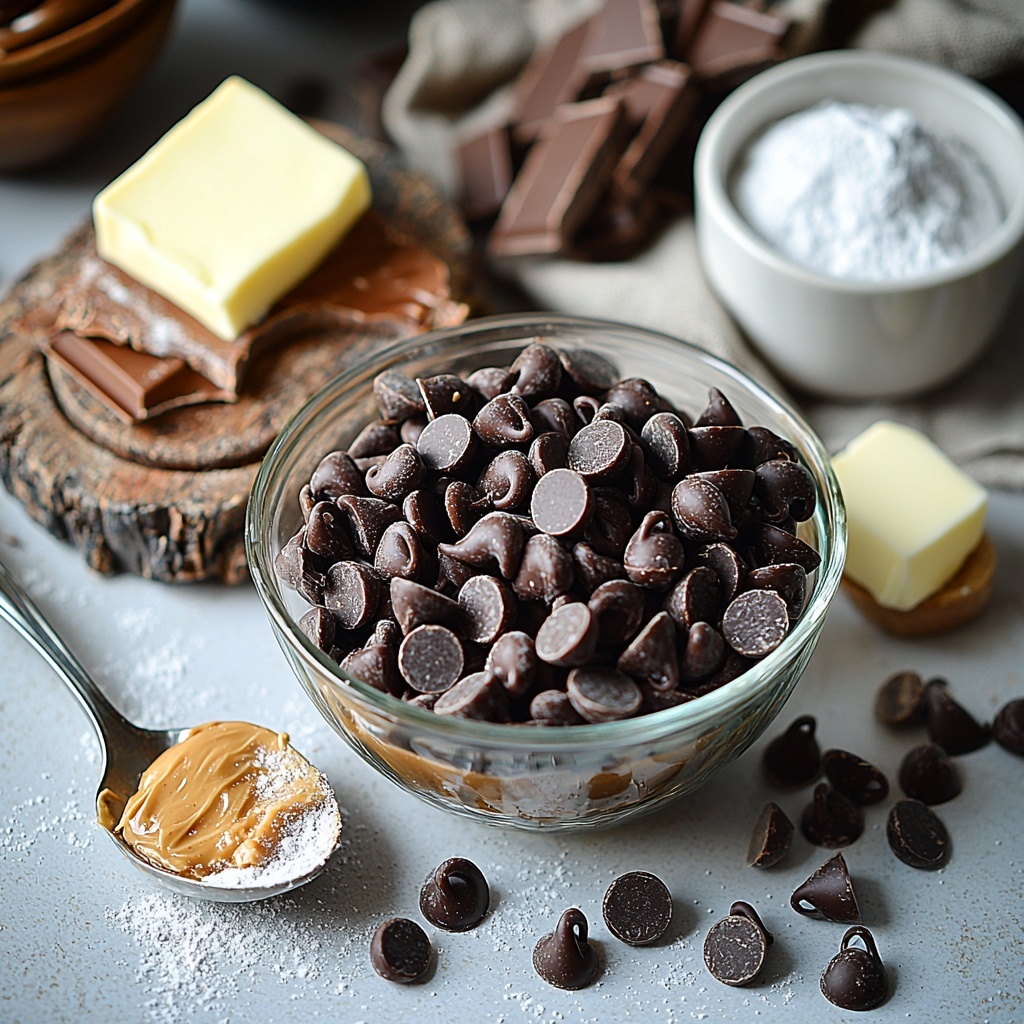
The beauty of this Peanut Butter Cups Recipe lies in its simplicity. Each ingredient plays an essential role, combining to create that perfect harmony of creamy, sweet, and slightly salty flavors, along with smooth, melt-in-your-mouth textures. Here’s what you’ll need:
- 14 ounces semi-sweet chocolate chips: Provides the rich chocolatey coating and base that holds everything together perfectly.
- 1 cup creamy peanut butter: Gives you that classic, smooth peanut flavor and creamy texture that’s key to this recipe.
- 6 tablespoons powdered sugar: Adds just the right hint of sweetness and helps thicken the peanut butter filling for a luscious bite.
- 4 tablespoons butter: Enhances the smoothness of the filling and adds a hint of richness to balance the flavors.
How to Make Peanut Butter Cups Recipe
Step 1: Prepare Your Muffin Pan
Start by lining a muffin pan with cupcake liners; this makes removing your peanut butter cups easy and keeps everything neatly shaped. It’s a small step that makes a big difference when your treats are ready to come out of the pan.
Step 2: Melt the First Half of Chocolate Chips
In a microwave-safe bowl, melt half of your semi-sweet chocolate chips until smooth. Make sure to heat the chocolate gently in short bursts, stirring between each, so you don’t scorch it. This silky chocolate will form the first chocolate layer of your peanut butter cups.
Step 3: Form the Chocolate Base
Spoon the melted chocolate into each cupcake liner, filling them about halfway. This chocolate base is not just delicious but also sturdy enough to hold the peanut butter filling. Pop the tray into the freezer for 10 to 15 minutes to let the chocolate firm up beautifully.
Step 4: Make the Peanut Butter Filling
While the chocolate base sets, whip up the peanut butter filling. In a mixing bowl, combine creamy peanut butter, powdered sugar, and butter. Mix until the blend is smooth and perfectly creamy—this filling is the star of the show, offering that melt-in-your-mouth peanut butter goodness.
Step 5: Add the Peanut Butter Layer
Once the chocolate base is firm, generously add the peanut butter mixture on top of each cup. Don’t worry if it’s a little uneven; the next step will cover it beautifully. Return the pan to the freezer for another 10 minutes so the peanut butter solidifies slightly, making it easier to top with chocolate.
Step 6: Melt and Add the Top Chocolate Layer
Now melt the remaining chocolate chips the same way you did the first half. Pour this melted chocolate gently over the peanut butter layer, ensuring each cup is fully covered. This final coat seals in the peanut butter, giving your cups that iconic look and perfect chocolate shell.
Step 7: Chill Until Set
Place your peanut butter cups back in the freezer for about 30 minutes for the chocolate to harden fully. Once set, you’re ready to enjoy these irresistible treats! The chill time is worth the wait for the satisfying snap and creamy middle you get with every bite.
How to Serve Peanut Butter Cups Recipe
Garnishes
Even though these peanut butter cups are delightful on their own, a sprinkle of flaky sea salt on top right before the chocolate sets adds a breathtaking contrast to the sweetness. You can also dust a tiny bit of cocoa powder or finely chopped roasted peanuts for extra texture and a pretty presentation.
Side Dishes
Pair these peanut butter cups with a tall glass of cold milk or a scoop of vanilla ice cream for an indulgent dessert experience. They also work beautifully as a sweet ending alongside coffee or a rich hot chocolate for cozy gatherings.
Creative Ways to Present
For gift-giving or parties, arrange the peanut butter cups in small paper candy cups or wrap them individually in parchment paper tied with twine. They can also be plated on a colorful dish surrounded by fresh berries or mint leaves for an elegant touch that will have everyone asking for the recipe.
Make Ahead and Storage
Storing Leftovers
These peanut butter cups keep best when stored in an airtight container in the refrigerator. They’ll stay fresh and maintain their texture for 3 to 4 days—perfect for enjoying throughout the week without losing that homemade charm.
Freezing
If you want to make a bigger batch or save some for later, they freeze beautifully. Store them in a freezer-safe container with parchment paper between layers, and they’ll keep well for up to 2 months. Just thaw them in the fridge before serving for the best texture.
Reheating
Since these treats are best served chilled or at room temperature, skip reheating. Instead, allow frozen peanut butter cups to thaw gradually in the refrigerator to preserve their rich, creamy layers and crisp chocolate shell.
FAQs
Can I use crunchy peanut butter instead of creamy?
Absolutely! Using crunchy peanut butter will add a lovely bit of texture to your peanut butter cups, giving each bite an extra nutty crunch. Just be sure the peanut butter is well mixed for even consistency.
Do I need to use powdered sugar or can I substitute it?
Powdered sugar is best because it dissolves smoothly into the filling, keeping it creamy without any grit. Granulated sugar won’t blend as easily, so for best results, stick with powdered sugar or try a fine alternative like icing sugar.
Is it okay to use milk chocolate instead of semi-sweet?
Yes! Milk chocolate will make your peanut butter cups sweeter and creamier. Semi-sweet chocolate offers a nice balance to the peanut butter’s richness, but feel free to adjust based on your preference—it’s your peanut butter cups recipe after all!
Can I make mini peanut butter cups instead of regular size?
Definitely! Just use mini cupcake liners and adjust your spooning accordingly. The freezing and layering process stays the same, and you’ll end up with perfect bite-sized treats that are great for parties or snacks.
What’s the best way to prevent chocolate from melting too soon?
Keep your peanut butter cups cool by storing them in the fridge or freezer. Also, tempering your chocolate (melting it gently and stirring carefully) helps it set with a nice snap and reduces melting at room temperature.
Final Thoughts
This Peanut Butter Cups Recipe is a fantastic way to bring a classic favorite into your kitchen with minimal fuss and maximum flavor. From the smooth chocolate to the creamy peanut butter center, every bite feels like a little celebration. Once you try making these yourself, they’ll quickly become your go-to treat for satisfying those sweet cravings or impressing friends with a homemade classic. So grab your ingredients, get cozy, and enjoy the fun of making these unforgettable peanut butter cups!
Print
Peanut Butter Cups Recipe
- Prep Time: 10 minutes
- Cook Time: 10 minutes
- Total Time: 35 minutes
- Yield: 12 servings
- Category: Dessert
- Method: No-Cook
- Cuisine: American
Description
This homemade Peanut Butter Cups recipe combines rich semi-sweet chocolate and creamy peanut butter into a delicious treat that’s easy to make and perfect for satisfying your sweet tooth. With layers of smooth melted chocolate and a sweet peanut butter filling, these cups freeze quickly and are great for snacking or sharing.
Ingredients
Chocolate Layer
- 14 ounces semi-sweet chocolate chips
- 4 tablespoons butter
Peanut Butter Filling
- 1 cup creamy peanut butter
- 6 tablespoons powdered sugar
Instructions
- Prepare the Pan: Line a muffin pan with cupcake liners to ensure easy removal of the peanut butter cups later.
- Melt First Half of Chocolate: In a microwave-safe bowl, melt half (7 ounces) of the semi-sweet chocolate chips until smooth, stirring every 20 seconds to avoid burning.
- Form Chocolate Base: Spoon the melted chocolate into the cupcake liners filling them halfway, then place the pan in the freezer for 10-15 minutes until the chocolate firms up.
- Make Peanut Butter Filling: In a mixing bowl, combine the creamy peanut butter, powdered sugar, and butter. Mix thoroughly until the mixture is smooth and evenly combined.
- Add Peanut Butter Layer: Spoon the peanut butter mixture over the firmed chocolate layer in each cupcake liner, then return the pan to the freezer for another 10 minutes to set the filling.
- Melt Remaining Chocolate: Melt the remaining 7 ounces of chocolate chips in a microwave-safe bowl until smooth, stirring frequently.
- Top with Chocolate: Pour the melted chocolate over the peanut butter layer, fully covering it. Smooth the tops if needed.
- Chill to Set: Place the pan back in the freezer for about 30 minutes to let the peanut butter cups fully set before serving.
Notes
- For best results, use creamy peanut butter for a smooth texture.
- Line the muffin pan with cupcake liners to make removal easier and less messy.
- Freezing times may vary slightly depending on your freezer; ensure each layer is firm before adding the next.
- Store finished peanut butter cups in an airtight container in the refrigerator or freezer to keep them fresh.
- You can substitute semi-sweet chocolate chips with milk chocolate or dark chocolate chips according to preference.
