

If you have a soft spot for flaky, buttery pastries filled with luscious fruit and creamy cheese, then you are absolutely going to adore this Easy Cherry Danish Pastry Recipe. It’s the perfect blend of flaky puff pastry, smooth cream cheese, and vibrant cherry pie filling that comes together effortlessly to create a bakery-quality treat at home. What makes this recipe so special is how approachable it is—anyone can whip it up with just a handful of straightforward ingredients and minimal fuss, yet it yields an incredibly impressive result that’s perfect for breakfast, brunch, or a delightful dessert. Get ready to bring a little slice of pastry heaven right into your kitchen.
Ingredients You’ll Need
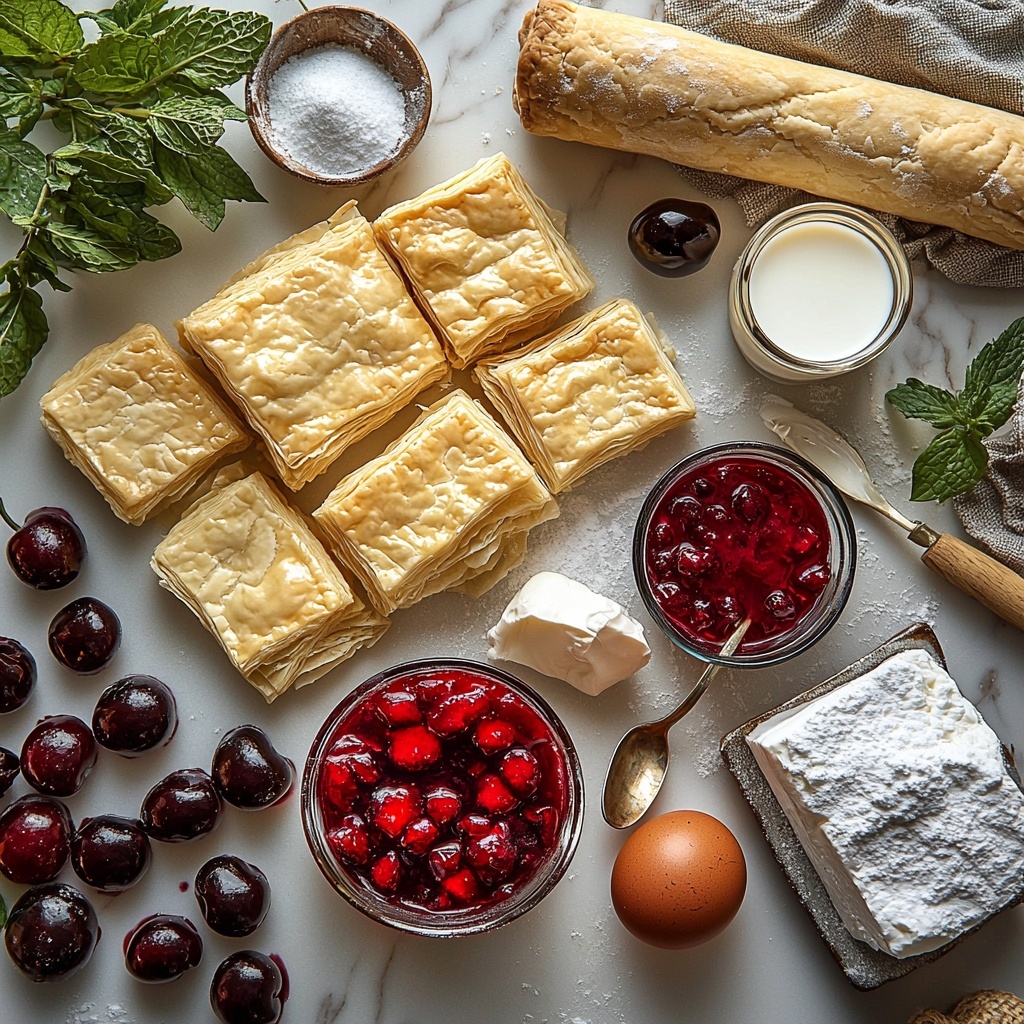
Getting the ingredients ready for this recipe is wonderfully simple but absolutely crucial—the balance of flavors and textures depends on each element working in harmony. From the rich cream cheese that adds that creamy tang, to the bright and bold cherry pie filling that gives it a burst of fruity sweetness, every ingredient plays an essential role.
- 17.3 oz thawed puff pastry: Use quality puff pastry to ensure those layers get delightfully flaky and golden brown.
- 21 oz canned cherry pie filling: Provides a sweet, juicy fruit center that’s full of vibrant cherry flavor.
- 8 oz cream cheese, softened: Adds a creamy and slightly tangy contrast that balances the sweetness perfectly.
- 1/4 cup granulated sugar: Sweetens the cream cheese filling just enough without overpowering.
- 1 tsp vanilla extract: Enhances the cream cheese mixture with a warm, comforting aroma and flavor.
- 1 large egg: Used in the egg wash to create that irresistible shiny, golden crust.
- 2 tsp water: Mixed with the egg to thin it just right for brushing.
- 1/2 cup powdered sugar: For dusting over the baked pastries, adding a pretty finishing touch.
- 2 tsp whole milk: Optional, if you want to create a simple icing drizzle for extra sweetness and shine.
How to Make Easy Cherry Danish Pastry Recipe
Step 1: Thaw and Prepare the Puff Pastry
Start by removing the puff pastry from the freezer and letting it thaw at room temperature. This step is important because it allows the dough to become pliable and ready for rolling, giving you those beautiful flaky layers in the final pastry.
Step 2: Make the Cream Cheese Filling
In a mixing bowl, combine the softened cream cheese, granulated sugar, and vanilla extract. Use a hand or stand mixer to whip everything together until the mixture is smooth, creamy, and luscious. This filling will bring a wonderful richness that perfectly complements the tart cherries.
Step 3: Prep the Baking Sheets
Line two baking sheets with parchment paper. This prevents the pastries from sticking and makes cleanup a breeze. The parchment will also help the pastries bake evenly without burning on the bottom.
Step 4: Roll and Cut the Pastry
Lightly flour your workspace to keep the dough from sticking, then unfold a thawed puff pastry sheet and gently roll it out to about a 9×11 inch rectangle. You don’t have to overdo it—just a light roll will do. Use the existing folds as guides to cut the pastry into 6 even-sized triangles. Repeat with the second sheet to get 12 triangles total.
Step 5: Score and Dock the Dough
Carefully score a 1/4-inch border inside each triangle using a sharp knife, being mindful not to cut fully through. Then, poke a few holes with a fork in the center inside the border. This technique lets the edges puff up more than the center, creating a nice raised frame around the filling.
Step 6: Add the Fillings
Transfer the triangles to the baking sheets. Spread about 2 tablespoons of the cream cheese mixture in the center of each triangle, then top each one with about 2 tablespoons of cherry pie filling. This precise layering keeps every bite perfectly balanced and luscious.
Step 7: Chill Before Baking
Pop the trays into the refrigerator and chill the assembled pastries for at least 15 minutes. This chilling step is a little secret that helps keep the pastry firm and aids in achieving those extra-puffy, beautifully shaped Danish pastries.
Step 8: Preheat and Prepare for Baking
Preheat your oven to 400 degrees Fahrenheit. In the meantime, whisk together the egg and water to make the egg wash. Use a pastry brush to gently coat only the outer border of the pastries—this gives them a stunning golden shine once baked.
Step 9: Bake and Cool
Bake the pastries at 400 degrees for about 15-20 minutes until they are puffed up and gorgeously golden. Remove from the oven and allow them to cool for about 5 to 10 minutes to set and be ready for the finishing touches.
Step 10: Add the Final Touches
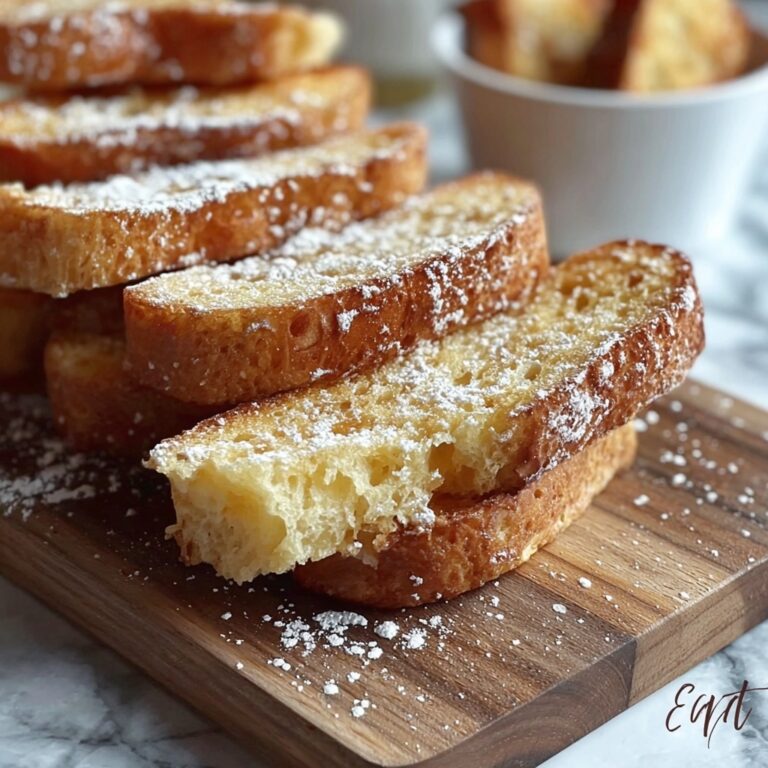
Dust the pastries generously with powdered sugar for a light, sweet finish. If you’re feeling fancy, mix powdered sugar with a splash of milk to create a simple icing and drizzle it over the top. Serve them warm for gooey goodness or chilled for a firmer texture—either way, they taste incredible.
How to Serve Easy Cherry Danish Pastry Recipe
Garnishes
To elevate your Easy Cherry Danish Pastry Recipe even more, consider adding fresh garnishes like a sprinkle of sliced toasted almonds or a few fresh cherries on top. These add a lovely crunch and extra pop of color that makes serving these pastries feel special.
Side Dishes
Pair these pastries with a cup of freshly brewed coffee or your favorite herbal tea for a perfect breakfast or brunch combo. They also go wonderfully with a bowl of fresh fruit salad to balance the richness with a juicy, refreshing bite.
Creative Ways to Present
Arrange the pastries on a tiered serving tray for brunch gatherings or sprinkle a few edible flowers around for a whimsical touch. You can also serve them alongside homemade whipped cream or vanilla yogurt for a delightful contrast.
Make Ahead and Storage
Storing Leftovers
If you have leftovers, store them in an airtight container at room temperature if eating the next day, or in the refrigerator for up to 3 days. The pastry will soften a bit but still taste delicious.
Freezing
You can freeze these pastries before baking. Assemble them on a baking sheet, freeze until solid, then transfer to an airtight container or bag. When ready, bake from frozen by adding a few extra minutes to the baking time.
Reheating
To reheat and revive the pastry’s flakiness, warm them in a 350-degree oven for 5-7 minutes. Avoid microwaving as it can make the pastry soggy. This way, they taste almost as fresh as when first baked.
FAQs
Can I use fresh cherries instead of canned cherry pie filling?
You definitely can! Just make sure to cook down fresh cherries with sugar and a bit of cornstarch to thicken the filling before adding it to the pastries. This helps prevent the filling from being too watery.
Is puff pastry the same as phyllo dough?
Although both are flaky, puff pastry is layered with butter and rises when baked to create a light, airy texture. Phyllo is much thinner and crispier but doesn’t puff. For this recipe, puff pastry is essential for that characteristic Danish flakiness.
Can I make these pastries vegan?
To make a vegan version, use dairy-free cream cheese and a plant-based puff pastry. Substitute the egg wash with a mixture of plant milk and maple syrup to achieve a golden crust.
How long do these pastries keep fresh?
These pastries are best enjoyed the day they are made but can stay tasty for up to 3 days when stored properly. For the best texture, consume or freeze them sooner rather than later.
Can I make the filling ahead of time?
Absolutely! You can prepare the cream cheese mixture a day in advance and keep it refrigerated. Just make sure to give it a good stir before spreading on the pastry to keep it smooth and creamy.
Final Thoughts
This Easy Cherry Danish Pastry Recipe is a total game-changer for anyone who loves baking but wants something quick, impressive, and absolutely delicious. It’s an inviting way to bring a little bit of bakery magic into your home kitchen with simple ingredients and straightforward steps. Whether you’re indulging on a lazy weekend morning or delighting guests at brunch, these pastries are sure to become a beloved favorite. So don’t hesitate—grab your puff pastry, cherries, and cream cheese and start baking some joyful magic today!
Print
Easy Cherry Danish Pastry Recipe
- Prep Time: 20 minutes
- Cook Time: 18 minutes
- Total Time: 52 minutes
- Yield: 12 pastries
- Category: Breakfast
- Method: Baking
- Cuisine: American
Description
This Easy Cherry Danish Pastry recipe features flaky puff pastry filled with a creamy sweetened cream cheese layer and topped with luscious cherry pie filling. Perfect for breakfast, brunch, or a delightful dessert, these elegant pastries are simple to assemble and bake to golden perfection, with a dusting of powdered sugar adding an extra touch of sweetness.
Ingredients
Puff Pastry and Filling
- 17.3 oz thawed puff pastry (1 pack)
- 21 oz canned cherry pie filling (1 can)
- 8 oz cream cheese, softened
- 1/4 cup granulated sugar
- 1 tsp vanilla extract
Egg Wash and Glaze
- 1 large egg
- 2 tsp water
- 1/2 cup powdered sugar
- 2 tsp whole milk
Instructions
- Thaw the puff pastry: Remove the puff pastry from the freezer and allow it to thaw completely at room temperature until pliable and ready to use.
- Prepare the cream cheese filling: In a mixing bowl, combine softened cream cheese, granulated sugar, and vanilla extract. Use a hand mixer or stand mixer to blend the ingredients until smooth and creamy. Set aside.
- Prepare baking sheets: Line two baking sheets with parchment paper suitable for 9×13 inch pans or larger to ensure easy removal and cleanup.
- Roll and cut the pastry: Lightly flour your work surface, then unfold one sheet of thawed puff pastry. Roll it out slightly to form a roughly 9×11 inch rectangle. Cut the sheet into 6 equal triangles by using the folded lines as guides. Repeat with the second sheet to yield 12 triangles in total.
- Score and poke pastry edges: Gently score a 1/4-inch border around the edge of each triangle without cutting through the dough. Use a fork to poke several holes in the center of each triangle—this helps the edges puff up higher than the center when baked.
- Assemble the pastries: Place all 12 triangles on the prepared baking sheets. Evenly divide the cream cheese mixture (approximately 2 tablespoons) in the center of each triangle, then top each with about 2 tablespoons of cherry pie filling.
- Chill before baking: Refrigerate the assembled pastries for at least 15 minutes to promote a puffier and more defined rise during baking.
- Preheat the oven: Set the oven temperature to 400°F (204°C) to prepare for baking.
- Apply egg wash: In a small bowl, whisk together the egg and water. Using a pastry brush, lightly coat the edges of each pastry with this egg wash to help them brown beautifully.
- Bake the pastries: Place the baking sheets in the oven and bake until the pastries are golden brown and puffed, about 15-18 minutes.
- Cool the pastries: Remove the pastries from the oven and let them cool for 5 to 10 minutes on the baking sheets to set before serving.
- Add finishing touch: Dust the pastries with powdered sugar. Optionally, mix the powdered sugar with whole milk to create a glaze and drizzle over the pastries for extra sweetness. Serve warm or chilled according to your preference.
Notes
- Make sure the puff pastry is properly thawed to ensure ease of handling and proper puffing during baking.
- Chilling assembled pastries before baking improves the final texture by helping the layers rise distinctly.
- The scoring technique on the perimeter prevents the filling from spreading and helps create a raised edge.
- Feel free to substitute cherry pie filling with other fruit fillings such as blueberry, raspberry, or apple for variety.
- For a dairy-free alternative, use dairy-free cream cheese and milk substitutes.


