
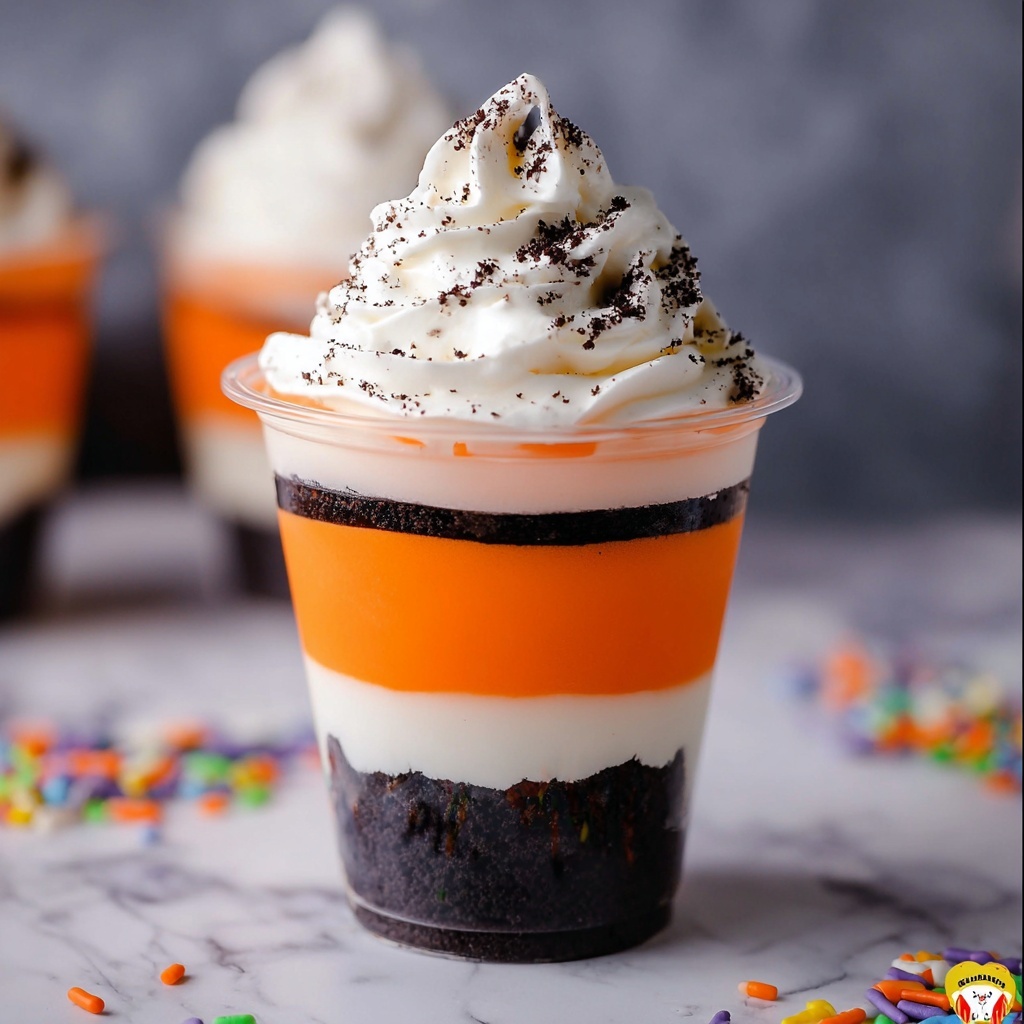
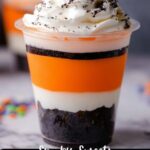
If you’re looking to charm your guests this spooky season, the No-Bake Halloween Cheesecake Cups Recipe is your secret weapon. These little beauties combine layers of crushed Oreos, luscious orange-tinted cheesecake filling, and pillowy Cool Whip, all nestled in clear cups for the perfect Halloween treat presentation. What’s truly delightful is how effortlessly you whip these up—no oven fuss, just simple ingredients coming together to create a dessert that’s as fun to make as it is to eat. Celebrate the holiday spirit with this vibrant and creamy dessert that offers a perfect balance of texture, color, and irresistible sweetness.
Ingredients You’ll Need
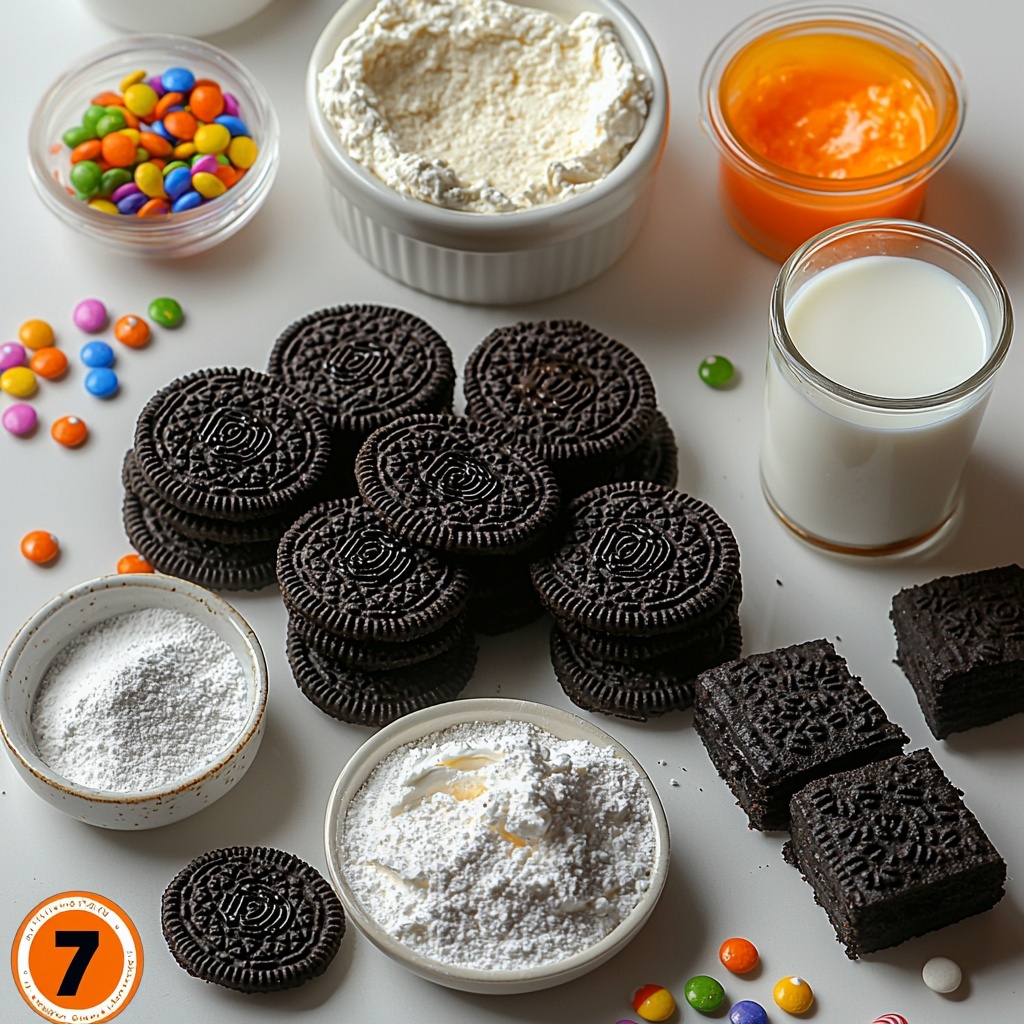
Gathering these ingredients is a breeze, but each one plays an essential role in bringing the No-Bake Halloween Cheesecake Cups Recipe to life. From the crunchy Oreo base to the creamy, colorful cheesecake layers, every item is crucial for taste, texture, and that festive Halloween vibe.
- Oreo cookies (18, divided): The crunchy chocolate base and middle layer add irresistible texture and contrast to creamy cheesecake.
- Cream cheese (2 packages, 8 ounces each, softened): The star ingredient provides creaminess and tang essential for cheesecake flavor.
- Powdered sugar (1 ½ cups): Sweetens the filling smoothly without any graininess.
- Milk (2 tablespoons): Lightens the cheesecake mixture for a silkier, more spreadable texture.
- Vanilla extract (1 ½ tablespoons): Adds warmth and depth to the cheesecake filling.
- Cool Whip (1 container, 8 ounces, thawed and divided): Keeps the cheesecake airy and fluffy, making each bite light and dreamy.
- Orange gel food coloring: Gives the cheesecake mixture its festive Halloween orange hue without watering down the flavor.
- Halloween sprinkles and candy: Perfect for topping and bringing extra color and fun to each cup.
How to Make No-Bake Halloween Cheesecake Cups Recipe
Step 1: Create the Oreo Crust Base
Start by crushing 9 of your Oreo cookies into fine crumbs—using a food processor or placing them in a sealed bag and rolling with a rolling pin does the trick. Evenly divide these crumbs among seven 8-ounce clear cups to form the crunchy foundation of your cheesecake cups. This base will provide a delightful chocolate crunch beneath the creamy layers.
Step 2: Prepare the Cheesecake Mixture
In a large mixing bowl, beat together the softened cream cheese, powdered sugar, milk, and vanilla extract until the mixture is smooth and creamy. This carefully balanced blend ensures your cheesecake cups have a rich yet light texture. Next, gently fold in 2 cups of thawed Cool Whip—be gentle so you don’t deflate that lovely fluffiness!
Step 3: Separate and Color the Cheesecake Layers
Divide the cheesecake mixture evenly into two bowls. Add a few drops of orange gel food coloring to one bowl and mix until you achieve a vibrant orange shade—this will lend your Halloween cups that unmistakable festive look. The other bowl remains plain white, offering a beautiful contrast in the layers.
Step 4: Assemble the First Cheesecake Layer
Using a spoon or piping bag, add about 3 tablespoons of the white cheesecake mixture onto the Oreo crust in each cup. Gently spread or press the mixture into an even layer. This creamy layer balances the cookie crunch perfectly.
Step 5: Add the Middle Oreo Layer
Crush the remaining 9 Oreos and sprinkle about a quarter cup of crumbs evenly over the white cheesecake layer in each cup. This second layer of crunchy cookies adds another dimension, creating those inviting, multi-textured bites.
Step 6: Add the Orange Cheesecake Layer
Next, spoon or pipe 3 tablespoons of the orange cheesecake mixture on top of the cookie crumbs in each cup. Press gently to level the layer. This colorful layer makes the No-Bake Halloween Cheesecake Cups Recipe pop visually and brings that distinct creamy flavor with a festive hue.
Step 7: Chill the Cups
Cover your assembled cheesecake cups and refrigerate for at least 2 hours to let the flavors meld and the layers set firmly. These can be stored tightly covered in the fridge for up to 4 days if made in advance—a perfect make-ahead dessert option for your Halloween party.
Step 8: Final Touches Before Serving
Right before serving, add a dollop of the remaining Cool Whip on top of each cup. Sprinkle additional crushed Oreos, Halloween-themed sprinkles, or candy of your choice to give each cup a festive, personalized flair. Your No-Bake Halloween Cheesecake Cups Recipe is now ready to wow!
How to Serve No-Bake Halloween Cheesecake Cups Recipe
Garnishes
Enhance the fun factor with a variety of garnishes. Use Halloween-themed sprinkles in black, orange, and white, mini candy eyes, or spooky-shaped candy pieces. A few crushed Oreos on top add texture, while a small candy pumpkin can bring a charming touch. These garnishes not only elevate presentation but also add delightful bursts of flavor and crunch with each bite.
Side Dishes
Pair these cheesecake cups with light, refreshing sides to balance out the richness. A plate of fresh fruit like sliced apples or a crisp green salad dressed with a citrus vinaigrette can complement this dessert perfectly. For a fun twist, serve alongside warm apple cider or pumpkin spice lattes to complete the Halloween experience.
Creative Ways to Present
Don’t be shy about presentation—clear cups are fantastic because they showcase the layered colors and textures beautifully. Elevate your setup by placing the cups on a themed serving tray lined with autumn leaves or cobweb-patterned napkins. You can also add small Halloween flags or themed picks into each cup to amp up the holiday spirit and make these treats party-ready.
Make Ahead and Storage
Storing Leftovers
These cheesecake cups keep wonderfully in the fridge if covered tightly with plastic wrap or stored in an airtight container. They’ll stay fresh and flavorful for up to 4 days, making them perfect for preparing in advance for a party or simply enjoying over several days.
Freezing
While freezing is possible, be mindful that the texture of the Cool Whip and cream cheese mixture can change once thawed, potentially becoming less creamy. If you choose to freeze, wrap each cheesecake cup individually in plastic wrap and place them in a freezer-safe bag. Thaw in the fridge overnight before serving and stir the top layer of Cool Whip gently to restore fluffiness.
Reheating
This recipe is best served chilled and does not require reheating. Keeping the cheesecake cups cold preserves their creamy texture and vibrant appearance—warm temperatures could cause separation or sogginess of the layers.
FAQs
Can I use a different cookie instead of Oreos?
Absolutely! While Oreo cookies add a classic chocolate crunch and striking contrast, you can swap them for chocolate graham crackers, chocolate wafer cookies, or any other cookie that pairs well with cheesecake. Just adjust crushing to keep the right texture.
Is it necessary to use gel food coloring?
Gel food coloring is recommended because it provides vibrant color without thinning the cheesecake mixture. Liquid food coloring can sometimes affect the consistency, but if gel isn’t available, use liquid sparingly for gentler coloring.
Can I make this recipe vegan or dairy-free?
To make a vegan or dairy-free version, substitute cream cheese and Cool Whip with plant-based alternatives available at many stores. Ensure your cookies are also vegan-friendly, and you can use a non-dairy milk option. The texture and flavor will be slightly different but still delicious.
How long do these cheesecake cups need to chill?
For best results, chill the cups for at least 2 hours. This allows the cheesecake layers to firm up and the flavors to meld perfectly. You can even chill them overnight if preparing ahead.
Can I double this recipe for a larger crowd?
Yes! The simple ingredient list and no-bake preparation make it easy to scale up. Just keep the layering process the same to maintain the beautiful separation of flavors and textures in each cup.
Final Thoughts
This No-Bake Halloween Cheesecake Cups Recipe is one of those feel-good desserts that brings joy not only because of how delicious it is but also how simple and fun it is to make. Whether you’re hosting a spooky bash or just craving a festive treat, these cups will quickly become a favorite for all ages. So gather your ingredients, put on your favorite Halloween playlist, and dive into crafting these charming, creamy delights—you won’t regret it!
Print
No-Bake Halloween Cheesecake Cups Recipe
- Prep Time: 20 minutes
- Cook Time: 0 minutes
- Total Time: 2 hours 20 minutes
- Yield: 7 cheesecake cups
- Category: Dessert
- Method: No-Cook
- Cuisine: American
- Diet: Vegetarian
Description
These No-Bake Halloween Cheesecake Cups combine crunchy Oreo cookie crumbs with creamy, colorful cheesecake layers and fluffy Cool Whip for a festive, easy-to-make dessert that requires no oven baking. Perfect for Halloween parties, they showcase vibrant orange and white layers with fun sprinkles and candy toppings.
Ingredients
Base
- 18 Oreo cookies, divided
Cheesecake Filling
- 2 packages (8 ounces each) cream cheese, softened
- 1 ½ cups powdered sugar
- 2 Tablespoons milk
- 1 ½ Tablespoons vanilla extract
- 1 container (8 ounces) Cool Whip, thawed and divided
- Orange gel food coloring
Toppings
- Halloween sprinkles and candy
- Additional crushed Oreo cookies
Instructions
- Prepare the base layer: Crush 9 of the Oreo cookies into fine crumbs and evenly distribute the crumbs among seven 8-ounce clear cups, forming the first crust layer.
- Make the cheesecake filling: In a large mixing bowl, beat together the softened cream cheese, powdered sugar, milk, and vanilla extract until smooth and creamy. Gently fold in 2 cups of the thawed Cool Whip until well combined.
- Divide and color the cheesecake mixture: Split the cheesecake mixture evenly into two separate bowls. Add orange gel food coloring to one bowl to tint the mixture bright orange, leaving the other bowl uncolored for the white layer.
- Add the white cheesecake layer: Using a spoon or piping bag, place about 3 tablespoons of the white cheesecake mixture over the Oreo crumbs in each cup. Gently press the mixture into an even layer.
- Second Oreo layer: Crush the remaining 9 Oreo cookies and sprinkle about ¼ cup of crumbs evenly over the white cheesecake layer in each cup.
- Orange cheesecake layer: Pipe or spoon 3 tablespoons of the orange cheesecake mixture on top of the Oreo crumb layer. Gently press this into an even layer.
- Chill the cups: Cover the cups and place them in the refrigerator to chill for at least 2 hours. This allows the cheesecake layers to set. The cups can be stored refrigerated for up to 4 days if tightly covered.
- Final topping and serving: Just before serving, dollop the remaining Cool Whip on top of each cup. Decorate with additional crushed Oreos, Halloween-themed sprinkles, and candy as desired. Serve chilled and enjoy your festive dessert!
Notes
- Make sure the cream cheese is fully softened for easy mixing and smooth texture.
- Use gel food coloring for vibrant orange color without altering the batter consistency.
- You can swap Cool Whip for homemade whipped cream if preferred, but make sure it is well chilled.
- Store cheesecake cups covered in the refrigerator to maintain freshness and prevent drying.
- These cheesecake cups are perfect for kids’ parties, Halloween gatherings, or as a spooky seasonal treat.

